Craving a taste of France? Dive into the world of Chocolate Macarons, a delightful French treat that’s sure to impress with its sophisticated flavor and texture.
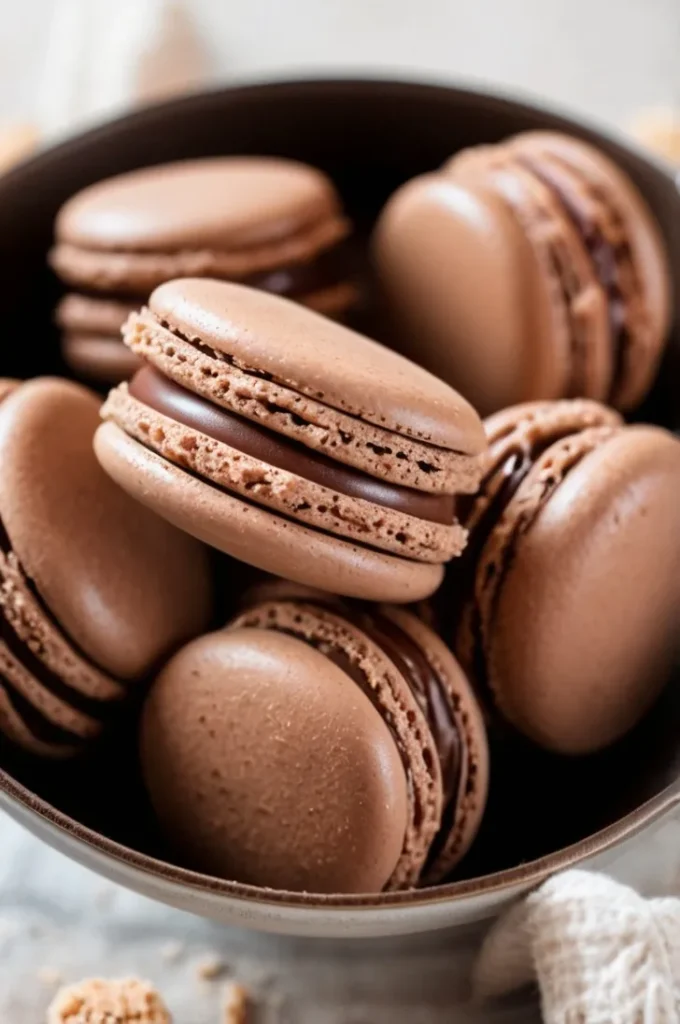
These delicate sandwich cookies boast a crisp exterior that gives way to a chewy interior, creating that perfect contrast in every bite.
Ingredients List
Creating perfect Chocolate Macarons requires precision and quality ingredients to achieve the perfect balance of flavors and textures. Let’s break down the ingredients needed for each element of these delicate cookies.
Shell Ingredients
- 50 g almond flour (superfine)
- 114 g powdered sugar
- 7 g cocoa powder (unsweetened, high quality)
- 57 g egg whites (aged overnight in the fridge and brought to room temperature)
- ⅛ teaspoon cream of tartar
- 28 g granulated sugar
- ½ teaspoon vanilla extract
- 1 pinch salt
Chocolate Ganache Filling
- 2 ounces heavy cream
- 2.5 ounces chocolate (semisweet, milk, or dark, based on preference)
- ½ teaspoon vanilla extract
- ⅛ teaspoon salt
Required Kitchen Tools
When preparing Chocolate Macarons, having the right kitchen tools can make the process more precise and enjoyable. Here are the essential tools you will need:
- Food Processor: To finely grind the almond flour and powdered sugar mixture, ensuring a smooth macaron shell.
- Stand Mixer or Hand Mixer: For whipping the egg whites to stiff peaks, which is crucial for the structure of the macarons.
- Kitchen Scale: Precision is key in macaron making, so measuring ingredients by weight rather than volume is essential.
- Sifter or Fine-Mesh Sieve: To ensure your dry ingredients are free of lumps and properly aerated.
- Piping Bag: Equipped with a round tip (approximately 1/2 inch diameter) for piping uniform macaron shells.
- Baking Sheets: Heavy-duty sheets that won’t warp in the oven, preferably lined with macaron templates and parchment paper.
- Rubber Spatula: For the crucial macaronage process of folding the dry ingredients into the meringue.
- Toothpicks: For popping any air bubbles that form on the surface of the piped macarons.
Having these tools on hand will set you up for a successful macaron-making experience.
Shell Preparation
Preparing the perfect macaron shell is a delicate process that requires attention to detail. The right technique will ensure your chocolate macarons have that characteristic smooth top, crisp exterior, and chewy interior that makes them so irresistible.
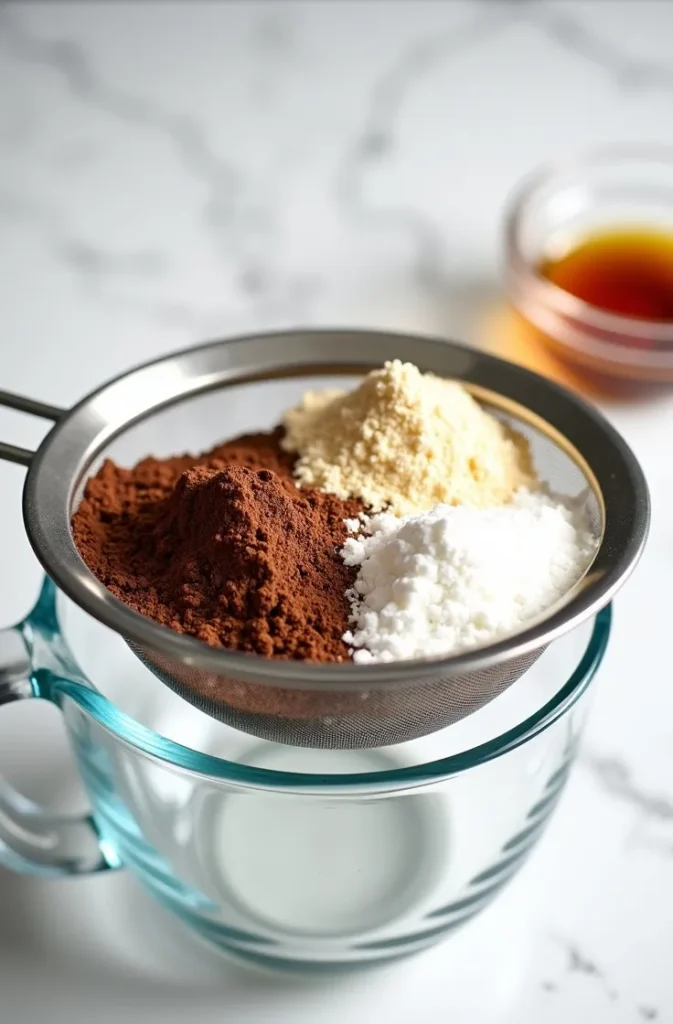
Preparing the Dry Ingredients
To start the shell preparation, sift together the powdered sugar, cocoa powder, salt, and almond flour. This step is crucial as it removes any lumps and ensures a smooth batter.
For extra refinement, pulse the mixture in a food processor 8-10 times to make the almond flour even finer in texture and to thoroughly blend the ingredients together. This extra step helps create that perfect smooth top on your finished macarons.
Making the Meringue
The meringue forms the base of your macaron shells and is critical to their structure. Begin by whipping room temperature aged egg whites on low speed until they reach a frothy consistency.
Slowly add the granulated sugar in thirds, allowing it to incorporate before each addition. Once the egg whites turn white and you can see some lines forming on the surface from the whisk, add the cream of tartar, which helps stabilize the meringue.
Continue whipping on medium speed until soft glossy peaks form, then add the vanilla extract. Increase to medium-high speed and whip until you achieve stiff peaks that start gathering and bunching on the inside of the whisk.
The meringue should be glossy and hold its shape when the whisk is lifted, with the tip of the peak standing straight up or folding over just slightly at the very end.
Macaronage Technique
The macaronage process—folding the dry ingredients into the meringue—is perhaps the most critical step in macaron making.
This technique requires a delicate balance: too little folding will result in lumpy, peaked shells, while overmixing will create flat, cracked macarons.
Add about one-third of your almond flour mixture to the meringue. Using a rubber spatula, fold by scraping around the edges of the bowl and cutting through the middle.
Continue adding the remaining almond mixture in two more additions, folding until the mixture is homogeneous.
Once combined, gently press the spatula on top of the batter while turning the bowl to remove some of the air from the meringue. The correct consistency is reached when the batter flows like lava and forms a ribbon when drizzled from the spatula.
The ribbon should slowly sink back into the remaining batter, almost dissolving completely but still leaving a slight trace. This is often described as the “figure 8 test”—the batter should be able to form a figure 8 when drizzled from your spatula without breaking.
Piping and Resting the Shells
Perfect piping is essential for uniform macarons that bake evenly and pair up nicely.
- Prepare Your Piping Bag:
Fit a piping bag with a round tip (approximately 1/2 inch in diameter) and fill with your macaron batter. - Pipe the Shells:
Hold the piping bag perpendicular to the baking sheet lined with your template and parchment paper. Squeeze gently to form rounds about 1 inch in diameter, then stop pressure and make a quick flick to avoid peaks. - Remove Air Bubbles:
Once all shells are piped, firmly tap the baking sheet on the counter 5-6 times from about 5 inches above to release any trapped air bubbles. Use a toothpick to pop any visible large air pockets. If you notice any rough spots or peaks, you can gently smooth them with a barely moistened fingertip. - Resting Period:
Allow the piped shells to rest, uncovered, until a dry film forms on the surface. This typically takes between 30 minutes to 2 hours, depending on humidity levels. In humid environments, placing a space heater nearby can help expedite this process. The shells are ready to bake when you can lightly touch the surface without batter sticking to your finger.
Baking the Macaron Shells
Proper baking is crucial for achieving the perfect texture and appearance of your chocolate macarons. The right temperature and timing will ensure your shells have a crisp exterior, chewy interior, and the characteristic “feet” at the base.
Oven Temperature and Baking Time
Preheat your oven to 320°F (160°C) before you begin piping your shells. This moderate temperature allows the macarons to rise slowly and develop feet without browning too quickly or cracking. Position your oven rack in the middle of the oven for the most even heat distribution.
Bake the dried macaron shells for approximately 14-15 minutes. The shells are done when they feel firm to the touch and have developed feet around the base.
They should have a slight browning, particularly visible on chocolate macarons as a slightly darker shade.
If they’re not quite done after the initial baking time, return them to the oven for an additional minute, but watch carefully to prevent over-baking.
Properly baked macarons will lift cleanly off the parchment paper once completely cooled. If they stick, they likely need more baking time. Allow the baked shells to cool completely on the baking sheet before attempting to remove them, as they are delicate and can crack if handled while warm.
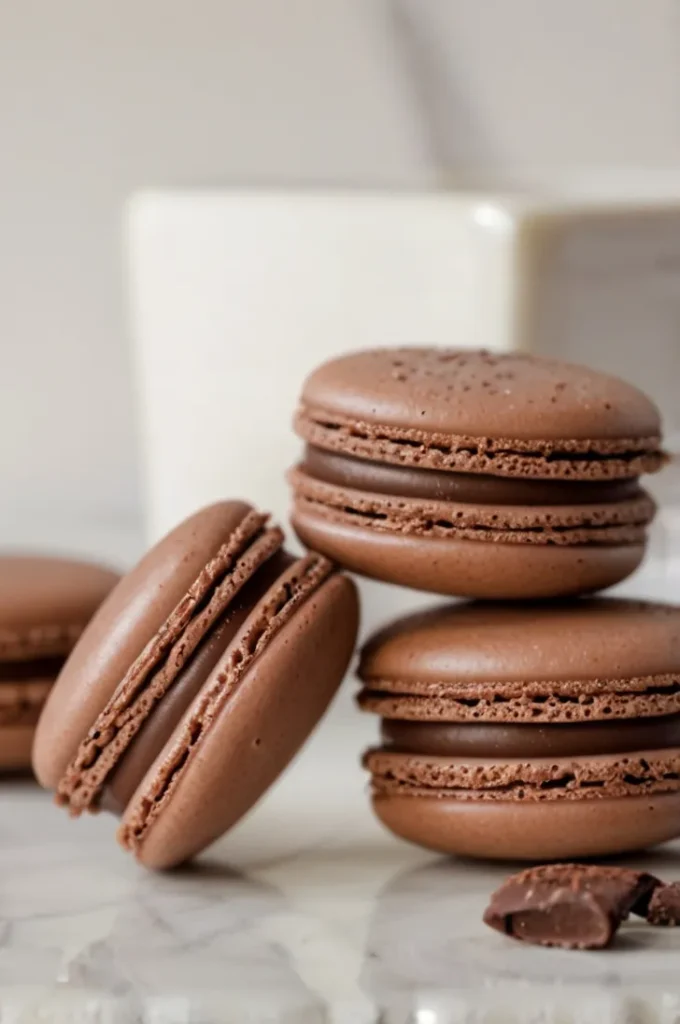
Making the Chocolate Ganache
The chocolate ganache filling adds a rich, smooth contrast to the crisp-chewy macaron shells. This simple yet luxurious filling complements the chocolate shells perfectly.
Preparing the Ganache
- Chop the Chocolate:
Begin by finely chopping your chosen chocolate (semisweet, milk, or dark) and placing it in a heat-proof bowl. The fine pieces will ensure even melting when combined with the hot cream. - Heat the Cream:
In a small saucepan, heat the heavy cream until it’s just beginning to simmer around the edges. Do not allow it to come to a full boil, as this can affect the texture of your ganache. - Combine and Emulsify:
Pour the hot cream over the chopped chocolate and let it sit for about 30 seconds to begin melting the chocolate. Then, using a spatula, gently stir from the center outward until the mixture becomes smooth and glossy. Add the vanilla extract and salt, stirring until fully incorporated. - Cooling:
Allow the ganache to cool at room temperature, stirring occasionally, until it reaches a pipeable consistency—similar to soft peanut butter. This typically takes about 30-45 minutes, depending on room temperature. For faster results, you can refrigerate the ganache for 10-15 minutes, stirring every 5 minutes to ensure even cooling.
Assembling the Macarons
The final step in creating perfect chocolate macarons is assembling the shells with the ganache filling. This process requires a gentle touch to avoid cracking the delicate shells.
Pairing and Filling
- Match Similar Shells:
Sort your cooled macaron shells by size, pairing similar-sized tops and bottoms together to ensure uniform sandwiches. - Prepare the Filling:
Transfer the cooled ganache to a piping bag fitted with a round tip. Alternatively, you can use a small offset spatula for spreading. - Apply the Filling:
Pipe or spread a generous dollop of ganache (about 1-2 teaspoons) onto the flat side of one shell from each pair. Be careful not to apply too much pressure when piping, as this can crack the shells. - Sandwich the Shells:
Gently place the matching shell on top of the ganache, applying slight pressure to spread the filling to the edges. The ganache should be visible but not oozing out of the sides. - Mature the Macarons:
For the best flavor and texture, allow the assembled macarons to “mature” in an airtight container in the refrigerator for at least 24 hours before serving. This resting period allows the shells to soften slightly and the flavors to meld.
Serving and Decoration
When it comes to serving and presenting your chocolate macarons, attention to detail can elevate these delicate treats from delicious to extraordinary. Here are some tips to ensure your macarons look as good as they taste:
Suggested Toppings and Decorations
Before your chocolate macaron shells are baked, you can enhance their appearance with various decorative elements:
- Cocoa Dusting: Lightly dust the tops of the piped, but not yet dried, shells with extra cocoa powder for a deeper chocolate appearance.
- Sprinkles: Delicately add a few chocolate sprinkles or finely chopped chocolate shavings to the tops before the shells dry.
- Edible Gold: For special occasions, a light dusting of edible gold powder can add an elegant touch to your chocolate macarons.
- Drizzled Chocolate: Once the macarons are assembled and set, you can drizzle thin lines of melted white or dark chocolate across the tops for contrast.
Presentation Ideas
- Tiered Display: Arrange your macarons on a tiered cake stand for an elegant presentation at parties or special gatherings.
- Gift Packaging: Stack macarons in clear cellophane bags tied with ribbon for a thoughtful homemade gift.
- Dessert Plating: For a restaurant-quality dessert presentation, place 2-3 macarons on a plate with complementary elements like fresh berries, a small scoop of ice cream, or a drizzle of chocolate sauce.
- Color Contrast: Serve chocolate macarons on a white plate or platter to highlight their rich color.
Storage Instructions
Proper storage is essential for maintaining the texture and flavor of your chocolate macarons. When stored correctly, these delicate treats can remain delicious for several days.
How to Keep Macarons Fresh
After assembling your chocolate macarons:
- Place them in an airtight container, ideally in a single layer to prevent crushing.
- Store the container in the refrigerator for 24-48 hours to allow the macarons to “mature.” This resting period actually improves their texture and allows the flavors to meld.
- For optimal flavor, remove the macarons from the refrigerator about 20-30 minutes before serving to allow them to come to room temperature.
- Properly stored macarons will keep in the refrigerator for up to 5 days, though they are best enjoyed within the first 3 days.
Freezing Macarons
If you want to keep your chocolate macarons for a longer period:
- Place the filled macarons in an airtight container, separating layers with parchment paper.
- Freeze for up to 3 months.
- To thaw, transfer the container to the refrigerator for several hours or overnight.
- Allow the macarons to come to room temperature before serving, approximately 20-30 minutes.
Alternatively, you can freeze unfilled shells for up to 6 months and prepare the ganache filling fresh when ready to assemble.

Chocolate Macarons
Ingredients
- 50 g almond flour (superfine)
- 114 g powdered sugar
- 7 g cocoa powder (unsweetened, high quality)
- 7 g egg whites (aged overnight in the fridge and brought to room temperature)
- ⅛ teaspoon cream of tartar
- 28 g granulated sugar
- ½ teaspoon vanilla extract
- 1 pinch salt
Chocolate Ganache
- 2 ounces heavy cream
- 2.5 ounces chocolate (semisweet, milk, or dark, based on preference)
- ½ teaspoon vanilla extract
- ⅛ teaspoon salt
Instructions
- To finely grind the almond flour and powdered sugar mixture, ensuring a smooth macaron shell.
- For whipping the egg whites to stiff peaks, which is crucial for the structure of the macarons.
- Precision is key in macaron making, so measuring ingredients by weight rather than volume is essential.
- To ensure your dry ingredients are free of lumps and properly aerated.
- Equipped with a round tip (approximately 1/2 inch diameter) for piping uniform macaron shells.
- Heavy-duty sheets that won't warp in the oven, preferably lined with macaron templates and parchment paper.
- For the crucial macaronage process of folding the dry ingredients into the meringue.
- For popping any air bubbles that form on the surface of the piped macarons.
Conclusion
Mastering chocolate macarons opens up a world of delightful possibilities in French patisserie.
The combination of crisp yet chewy chocolate shells with smooth, rich ganache creates a textural and flavor experience that’s truly special.
Though they require precision and patience, the rewards of creating these elegant treats in your own kitchen are well worth the effort.