Can you cook a turkey in a Ninja Foodi? That's the big question we're tackling today.
Can You Actually Cook a Turkey in a Ninja Foodi? Let's Find Out
So, you're probably wondering if you can ditch the oven and cook your Thanksgiving turkey in a Ninja Foodi.
The answer is YES, you absolutely can cook a turkey in a Ninja Foodi!
It might sound crazy, but I'm here to tell you it's not only possible but can also be a game-changer.
We will cover cooking a whole turkey vs. smaller cuts, the benefits, and how to make it happen.
Why Consider Cooking a Turkey in a Ninja Foodi?
Okay, let's be real. Ovens are great, but they can take FOREVER to cook a turkey.
Plus, they hog up all the oven space, leaving you scrambling to cook side dishes.
That is where the Ninja Foodi comes into play.
The Ninja Foodi offers a faster cooking time with the pressure cooking function, freeing up your oven for other dishes.
Plus, the crisping lid gives you that perfectly browned, crispy skin everyone loves.
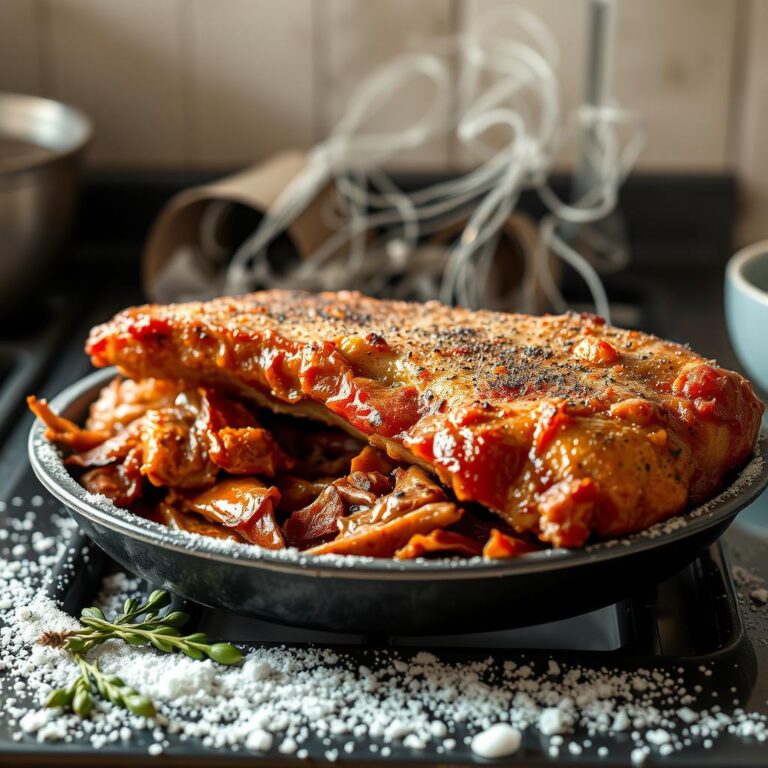
Whole Turkey vs. Turkey Breast: What Works Best?
Now, let's talk about size.
A massive 20-pound turkey might be a bit ambitious for most Ninja Foodi models.
Consider a smaller turkey, like 10-12 pounds, or opt for a turkey breast.
A turkey breast cooks beautifully in the Ninja Foodi and is perfect for smaller gatherings.
Benefits of Cooking a Turkey in a Ninja Foodi
- Faster Cooking Time: Pressure cooking drastically reduces cooking time.
- Crispy Skin: The air fryer function crisps up the skin to golden perfection.
- Saves Oven Space: Frees up your oven for side dishes and desserts.
- Tender and Juicy Meat: The pressure cooking locks in moisture, resulting in incredibly tender meat.
- Easy Cleanup: The non-stick pot makes cleanup a breeze.
What Size Ninja Foodi Do I Need?
This is crucial.
You need to ensure your Ninja Foodi is large enough to accommodate your turkey.
The 6.5-quart or 8-quart models are generally recommended for smaller turkeys or turkey breasts.
Always check the manufacturer's guidelines for your specific model.
Essential Tools for Ninja Foodi Turkey Cooking
- Ninja Foodi: Obviously!
- Meat Thermometer: A must-have for ensuring the turkey is cooked to a safe internal temperature (165°F).
- Trivet: To keep the turkey elevated above the liquid.
- Aluminum Foil: For tenting the turkey to prevent over-browning.
- Turkey Baster (optional): For basting the turkey with pan juices.
Preparing Your Turkey for the Ninja Foodi
- Thawing: Ensure your turkey is completely thawed before cooking. (Safety first!)
- Brining (optional): Brining adds flavor and moisture.
- Seasoning: Get creative with your favorite herbs, spices, and rubs.
Step-by-Step Guide to Cooking a Turkey Breast in a Ninja Foodi
Since a whole turkey might be pushing it, let's focus on a turkey breast, which is more manageable.
- Prep the Turkey Breast: Pat the turkey breast dry with paper towels.
- Season Generously: Rub your favorite seasoning blend all over the turkey breast.
- Add Liquid: Pour about 1 cup of chicken broth or turkey broth into the Ninja Foodi pot.
- Place on Trivet: Place the trivet in the pot and set the turkey breast on top.
- Pressure Cook: Close the pressure cooking lid and set the valve to the sealing position. Cook on high pressure for 6-8 minutes per pound.
- Natural Pressure Release: Allow the pressure to release naturally for 15-20 minutes, then manually release any remaining pressure.
- Check Temperature: Use a meat thermometer to ensure the internal temperature reaches 165°F.
- Crisp the Skin (optional): If desired, use the air crisp function to crisp the skin. Remove the turkey breast from the pot, discard the liquid, and place the turkey breast back in the pot. Air crisp at 390°F for 5-10 minutes, or until the skin is golden brown and crispy.
- Rest: Let the turkey breast rest for 10-15 minutes before slicing.
Tips for a Perfectly Cooked Ninja Foodi Turkey
- Don't Overcrowd: Make sure the turkey isn't crammed into the pot.
- Use a Meat Thermometer: This is the ONLY way to guarantee doneness.
- Adjust Cooking Time: Cooking times may vary depending on the size of the turkey and your Ninja Foodi model.
- Basting: Basting during the air crisping process can add extra flavor and moisture.
- Let It Rest: Resting is crucial for juicy, tender meat.
Common Mistakes to Avoid
- Not Thawing the Turkey: This leads to uneven cooking.
- Overcooking: Dry turkey is a Thanksgiving tragedy.
- Ignoring the Liquid: You need liquid for pressure cooking!
- Skipping the Meat Thermometer: Don't guess!
- Forgetting to Rest: Patience is key.
Flavor Variations and Seasoning Ideas
- Classic Herb Rub: Rosemary, thyme, sage, garlic powder, onion powder, salt, and pepper.
- Citrus Herb Rub: Lemon zest, orange zest, rosemary, thyme, garlic, salt, and pepper.
- Spicy Southwest Rub: Chili powder, cumin, smoked paprika, garlic powder, onion powder, cayenne pepper, salt, and pepper.
- Maple Glazed Turkey: Brush with maple syrup during the last few minutes of air crisping.
What to Do with Leftover Ninja Foodi Turkey
- Turkey Sandwiches: Classic and delicious.
- Turkey Soup: Perfect for a chilly day.
- Turkey Pot Pie: Comfort food at its finest.
- Turkey Salad: A light and refreshing option.
- Turkey Tetrazzini: A creamy and cheesy pasta bake.
So, can you cook a turkey in a Ninja Foodi? Absolutely, and you can create a delicious and memorable meal.

Can you cook a turkey in a Ninja Foodi? That's the big question we're tackling today.
Can You Actually Cook a Turkey in a Ninja Foodi? Let's Find Out
So, you're probably wondering if you can ditch the oven and cook your Thanksgiving turkey in a Ninja Foodi.
The answer is YES, you absolutely can cook a turkey in a Ninja Foodi!
It might sound crazy, but I'm here to tell you it's not only possible but can also be a game-changer.
We will cover cooking a whole turkey vs. smaller cuts, the benefits, and how to make it happen.
Why Consider Cooking a Turkey in a Ninja Foodi?
Okay, let's be real.
Ovens are great, but they can take FOREVER to cook a turkey.
Plus, they hog up all the oven space, leaving you scrambling to cook side dishes.
That is where the Ninja Foodi comes into play.
The Ninja Foodi offers a faster cooking time with the pressure cooking function, freeing up your oven for other dishes.
Plus, the crisping lid gives you that perfectly browned, crispy skin everyone loves.
Whole Turkey vs. Turkey Breast: What Works Best?
Now, let's talk about size.
A massive 20-pound turkey might be bit ambitious for most Ninja Foodi models.
Consider a smaller turkey, like 10-12 pounds, or opt for a turkey breast.
A turkey breast cooks beautifully in the Ninja Foodi and is perfect for smaller gatherings.
Benefits of Cooking a Turkey in a Ninja Foodi
- Faster Cooking Time: Pressure cooking drastically reduces cooking time.
- Crispy Skin: The air fryer function crisps up the skin to golden perfection.
- Saves Oven Space: Frees up your oven for side dishes and desserts.
- Tender and Juicy Meat: The pressure cooking locks in moisture, resulting in incredibly tender meat.
- Easy Cleanup: The non-stick pot makes cleanup a breeze.
What Size Ninja Foodi Do I Need?
This is crucial.
You need to ensure your Ninja Foodi is large enough to accommodate your turkey.
The 6.5-quart or 8-quart models are generally recommended for smaller turkeys or turkey breasts.
Always check the manufacturer's guidelines for your specific model.
Essential Tools for Ninja Foodi Turkey Cooking
- Ninja Foodi: Obviously!
- Meat Thermometer: A must-have for ensuring the turkey is cooked to a safe internal temperature (165°F).
- Trivet: To keep the turkey elevated above the liquid.
- Aluminum Foil: For tenting the turkey to prevent over-browning.
- Turkey Baster (optional): For basting the turkey with pan juices.
Preparing Your Turkey for the Ninja Foodi
- Thawing: Ensure your turkey is completely thawed before cooking. (Safety first!)
- Brining (optional): Brining adds flavor and moisture.
- Seasoning: Get creative with your favorite herbs, spices, and rubs.
Step-by-Step Guide to Cooking a Turkey Breast in a Ninja Foodi
Since a whole turkey might be pushing it, let's focus on a turkey breast, which is more manageable.
- Prep the Turkey Breast: Pat the turkey breast dry with paper towels.
- Season Generously: Rub your favorite seasoning blend all over the turkey breast.
- Add Liquid: Pour about 1 cup of chicken broth or turkey broth into the Ninja Foodi pot.
- Place on Trivet: Place the trivet in the pot and set the turkey breast on top.
- Pressure Cook: Close the pressure cooking lid and set the valve to the sealing position. Cook on high pressure for 6-8 minutes per pound.
- Natural Pressure Release: Allow the pressure to release naturally for 15-20 minutes, then manually release any remaining pressure.
- Check Temperature: Use a meat thermometer to ensure the internal temperature reaches 165°F.
- Crisp the Skin (optional): If desired, use the air crisp function to crisp the skin. Remove the turkey breast from the pot, discard the liquid, and place the turkey breast back in the pot. Air crisp at 390°F for 5-10 minutes, or until the skin is golden brown and crispy.
- Rest: Let the turkey breast rest for 10-15 minutes before slicing.
Tips for a Perfectly Cooked Ninja Foodi Turkey
- Don't Overcrowd: Make sure the turkey isn't crammed into the pot.
- Use a Meat Thermometer: This is the ONLY way to guarantee doneness.
- Adjust Cooking Time: Cooking times may vary depending on the size of the turkey and your Ninja Foodi model.
- Basting: Basting during the air crisping process can add extra flavor and moisture.
- Let It Rest: Resting is crucial for juicy, tender meat.
Common Mistakes to Avoid
- Not Thawing the Turkey: This leads to uneven cooking.
- Overcooking: Dry turkey is a Thanksgiving tragedy.
- Ignoring the Liquid: You need liquid for pressure cooking!
- Skipping the Meat Thermometer: Don't guess!
- Forgetting to Rest: Patience is key.
Flavor Variations and Seasoning Ideas
- Classic Herb Rub: Rosemary, thyme, sage, garlic powder, onion powder, salt, and pepper.
- Citrus Herb Rub: Lemon zest, orange zest, rosemary, thyme, garlic, salt, and pepper.
- Spicy Southwest Rub: Chili powder, cumin, smoked paprika, garlic powder, onion powder, cayenne pepper, salt, and pepper.
- Maple Glazed Turkey: Brush with maple syrup during the last few minutes of air crisping.
What to Do with Leftover Ninja Foodi Turkey
- Turkey Sandwiches: Classic and delicious.
- Turkey Soup: Perfect for a chilly day.
- Turkey Pot Pie: Comfort food at its finest.
- Turkey Salad: A light and refreshing option.
- Turkey Tetrazzini: A creamy and cheesy pasta bake.
So, can you cook a turkey in a Ninja Foodi? Absolutely, and you can create a delicious and memorable meal.
Now that we've covered the basics, let's dive deeper into getting the most out of cooking your turkey in a Ninja Foodi.
Advanced Ninja Foodi Turkey Techniques for the Best Results
Ready to level up your Ninja Foodi turkey game?
These are some tips and tricks that will take your bird from good to absolutely unforgettable, and will give you the best results when you cook a turkey in your Ninja Foodi.
Brining Your Turkey for Maximum Moisture and Flavor
Brining is a total game-changer if you're aiming for a juicy, flavorful turkey breast in your Ninja Foodi.
Basically, you're soaking the turkey in a saltwater solution infused with herbs and spices.
This helps the meat retain moisture during cooking, resulting in a super tender and delicious final product.
Here's a simple brine recipe you can try, and it will certainly enhance the flavor when you cook a turkey in your Ninja Foodi:
- 1 gallon of water
- 1 cup of kosher salt
- 1/2 cup of sugar (brown or white)
- 4 cloves of garlic, crushed
- 2 sprigs of rosemary
- 1 tablespoon of black peppercorns
- 1 orange, quartered
Combine all ingredients in a large pot and bring to a simmer, stirring until the salt and sugar dissolve.
Let the brine cool completely before adding the turkey breast.
Submerge the turkey breast in the brine and refrigerate for 8-12 hours.
Rinse the turkey breast thoroughly with cold water before seasoning and cooking.
Injecting Flavor into Your Ninja Foodi Turkey
Want to get flavor deep inside the meat?
Consider injecting your turkey breast with a flavorful marinade.
This is a fantastic way to add moisture and flavor from the inside out.
You can buy pre-made marinades or create your own using ingredients like:
- Chicken broth
- Melted butter
- Garlic
- Herbs
- Spices
Use a meat injector to inject the marinade into various parts of the turkey breast, making sure to distribute it evenly.
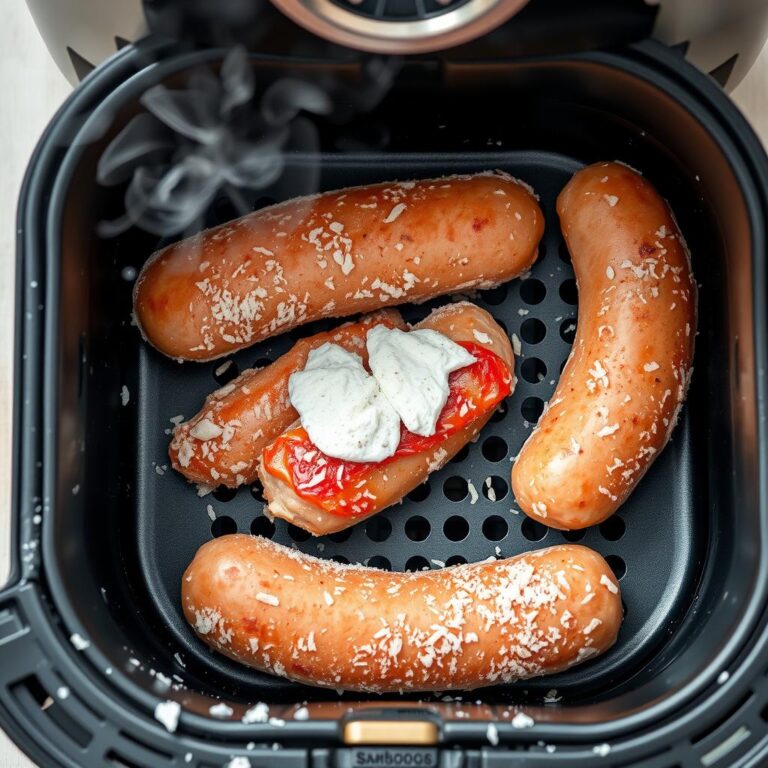
Perfecting the Crispy Skin on Your Ninja Foodi Turkey
That crispy skin is the holy grail of turkey cooking, and the Ninja Foodi's air crisp function makes it achievable.
Here are a few tips for achieving that perfect golden-brown, crispy skin when you cook a turkey in your Ninja Foodi:
- Dry the Skin: Pat the turkey breast completely dry with paper towels before seasoning.
Moisture is the enemy of crispy skin. - Use High Heat: The air crisp function works best at high temperatures (around 390°F).
- Basting: Baste the turkey breast with melted butter or pan juices during the air crisping process.
This adds flavor and helps the skin to brown evenly. - Don't Overcrowd: Make sure the turkey breast isn't crammed into the pot.
Air needs to circulate for even crisping.
Making Gravy from Ninja Foodi Turkey Drippings
Don't let those delicious pan drippings go to waste!
You can easily make a flavorful gravy right in your Ninja Foodi.
After pressure cooking the turkey breast, carefully remove it from the pot and set it aside to rest.
Pour the pan drippings into a fat separator to remove excess fat.
Return a few tablespoons of the fat to the Ninja Foodi pot and whisk in an equal amount of flour.
Cook over medium heat, stirring constantly, until the flour is lightly browned.
Slowly whisk in the reserved pan drippings and enough chicken broth to reach your desired consistency.
Bring to a simmer and cook, stirring occasionally, until the gravy has thickened.
Season with salt, pepper, and any other herbs or spices you like.
Adapting Your Favorite Turkey Recipe for the Ninja Foodi
Got a favorite oven-roasted turkey recipe?
You can adapt it for the Ninja Foodi!
The key is to adjust the cooking time and temperature to account for the pressure cooking and air crisping functions.
A good rule of thumb is to reduce the oven cooking time by about 50% when pressure cooking.
For example, if your recipe calls for roasting a turkey breast for 2 hours at 350°F, you would pressure cook it for about 1 hour.
Then, use the air crisp function to brown the skin to your liking.
Understanding Pressure Cooking for Tender Turkey
Pressure cooking is essential when you cook a turkey in a Ninja Foodi, as it drastically reduces cooking time and seals in moisture, resulting in a tender turkey.
However, it's crucial to understand how pressure cooking works to avoid overcooking or undercooking your turkey.
- Liquid is Key: You need liquid in the pot for pressure cooking to work.
About 1 cup of chicken broth or turkey broth is usually sufficient. - Sealing the Lid: Make sure the pressure cooking lid is properly sealed and the valve is set to the sealing position.
- Natural Pressure Release: Allowing the pressure to release naturally for 15-20 minutes after cooking helps to prevent the turkey from drying out.
Common Issues and How to Solve Them When You Cook a Turkey in a Ninja Foodi
Even with the best planning, things can sometimes go wrong.
Here's how to troubleshoot common problems when you cook a turkey in your Ninja Foodi:
- Turkey is Dry: This usually means the turkey was overcooked.
Use a meat thermometer to ensure the internal temperature reaches 165°F, and don't overcook it.
Brining and injecting can also help. - Skin is Not Crispy: Make sure the turkey skin is completely dry before air crisping.
Use high heat and baste with melted butter or pan juices. - Turkey is Too Big: A too-large turkey won't cook evenly.
Use a smaller turkey or just the turkey breast. - Pressure Not Building: Check that the lid is properly sealed and the valve is in the sealing position.
Also, make sure there's enough liquid in the pot.
FAQs About Cooking Turkey in a Ninja Foodi
Got more questions?
Here are some common queries addressed:
Can I cook a frozen turkey in the Ninja Foodi?
No, it's not recommended to cook a frozen turkey in the Ninja Foodi for safety reasons.
Ensure your turkey is fully thawed before cooking.
How do I know when the turkey is done?
Use a meat thermometer to check the internal temperature.
It should reach 165°F in the thickest part of the breast and thigh.
Can I use the Ninja Foodi to cook other parts of the Thanksgiving meal?
Absolutely!
The Ninja Foodi is great for cooking side dishes like mashed potatoes, stuffing, and vegetables, saving you oven space and time.
Is it safe to cook a turkey in the Ninja Foodi?
Yes, as long as you follow proper food safety guidelines, such as ensuring the turkey is fully thawed and cooked to a safe internal temperature.
Can I cook a bone-in turkey breast in the Ninja Foodi?
Yes, you can cook a bone-in turkey breast in the Ninja Foodi.
Adjust the cooking time accordingly based on the weight of the breast.
In conclusion, you absolutely can cook a turkey in a Ninja Foodi, and with these advanced tips and tricks, you're well on your way to creating a delicious and memorable Thanksgiving meal.
“`json
“`