Craving a cake that’s rich, creamy, and irresistibly crunchy? Dive into the world of Butterfinger Cake, a decadent dessert that combines moist chocolate cake, luscious caramel filling, and a fluffy peanut butter whipped topping, all crowned with crushed Butterfinger candy bars.

Ingredients List
Creating a decadent Butterfinger Cake requires a few key components to layer flavor and texture. Let’s break down the ingredients needed for each element of this irresistible dessert.
Cake Base Ingredients
- 1 box (15.25 oz) chocolate cake mix (e.g., devil’s food)
- 3 large eggs (room temperature)
- 1 cup (240 ml) water
- ½ cup (120 ml) oil
Filling Ingredients
- 12 oz (1 can) sweetened condensed milk
- 12 oz (1 bottle) caramel sauce
Whipped Topping
- 1½ cups (360 ml) cold heavy cream
- 2 tablespoons creamy peanut butter (optional)
- ¼ cup (30 g) powdered sugar
Garnish
- 2–3 Butterfinger candy bars, chopped
Required Kitchen Tools
To make a Butterfinger Cake with ease and precision, having the right tools on hand is essential. Here’s what you’ll need:
- Mixing Bowl: For combining the cake ingredients and whipped topping.
- 9 x 13 Inch Baking Pan: The perfect size for building and chilling your cake layers.
- Stand Mixer or Hand Mixer: To mix the batter and whip the cream to stiff peaks.
- Wooden Spoon (with thick handle): Ideal for poking holes in the cake after baking.
- Parchment Paper: Lining the baking pan makes for easier cleanup and potential lifting of the cake for serving.
Cake Preparation
Baking the cake base properly sets the foundation for this indulgent dessert. Follow these steps to ensure a rich, moist chocolate cake that will soak up all the creamy caramel goodness.
Mixing and Baking the Cake
- Preheat the Oven:
Set your oven to 350°F (177°C). Lightly grease the bottom and sides of a 9 x 13 inch baking pan. For easy removal later, line the bottom and long sides with parchment paper, leaving a bit of overhang. - Prepare the Cake Batter:
In a large mixing bowl, combine the chocolate cake mix, eggs, oil, and water. Whisk the mixture thoroughly for about 2 minutes, or until smooth and well combined. - Bake the Cake:
Pour the batter evenly into the prepared pan. Bake for 20–25 minutes, or until a toothpick inserted into the center of the cake comes out with a few moist crumbs. Avoid overbaking for a soft, moist texture. - Cool and Poke:
Allow the cake to cool in the pan for about 15–20 minutes. Once it’s warm (not hot), use the thick handle of a wooden spoon to poke holes all over the cake, spacing them about 1 inch apart. These holes will hold the caramel filling and create an ultra-moist texture.
Adding the Filling
This step transforms a simple chocolate cake into a luscious, candy-bar-inspired dessert by infusing it with rich caramel flavor.
Pouring and Spreading the Caramel
- Mix the Filling:
In a small bowl, whisk together the sweetened condensed milk and caramel sauce until smooth and well combined. - Fill the Cake:
Pour the caramel mixture slowly over the surface of the cake, making sure it seeps into every hole. Use a spatula to spread the sauce evenly across the surface. - Chill the Cake:
Cover the pan with plastic wrap and refrigerate the cake for at least 1–2 hours (or overnight) to allow the caramel to fully absorb and the flavors to meld.
Whipped Topping Preparation
The whipped topping adds a light, creamy contrast to the rich chocolate and caramel layers. The optional addition of peanut butter enhances the flavor with a nutty, salty-sweet finish.
Making the Whipped Cream
- Chill Your Tools:
For best results, place your mixing bowl and beaters or whisk attachment in the refrigerator for about 10–15 minutes before starting. Cold tools help the cream whip faster and hold its shape. - Whip the Cream:
In the chilled bowl, add the cold heavy cream and powdered sugar. Beat on low speed to combine, then gradually increase to medium-high speed. - Add Peanut Butter (Optional):
For a peanut butter twist, add 1 to 2 tablespoons of creamy peanut butter once soft peaks form. Continue whipping until the cream reaches medium-stiff peaks—it should hold its shape but still appear smooth and fluffy. - Top the Cake:
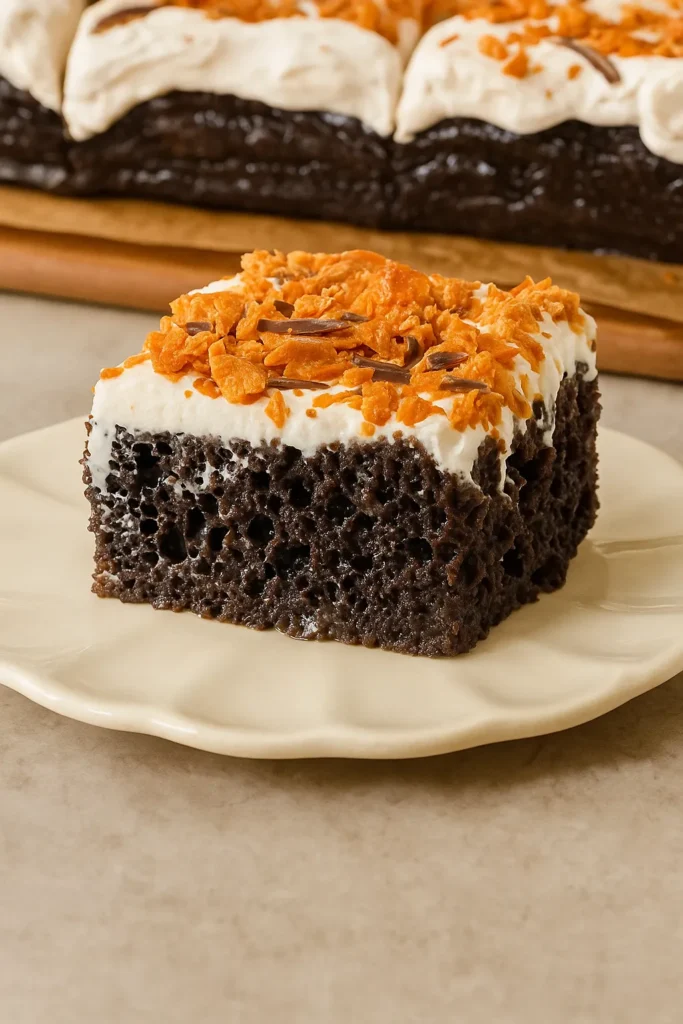
Once the cake is chilled and the filling has set, spread the whipped topping over the entire surface of the cake using an offset spatula or the back of a spoon. Smooth it out evenly to create a clean layer.
Serving and Decoration
The finishing touches take this cake from simple to stunning, adding crunch, color, and irresistible candy-bar appeal.

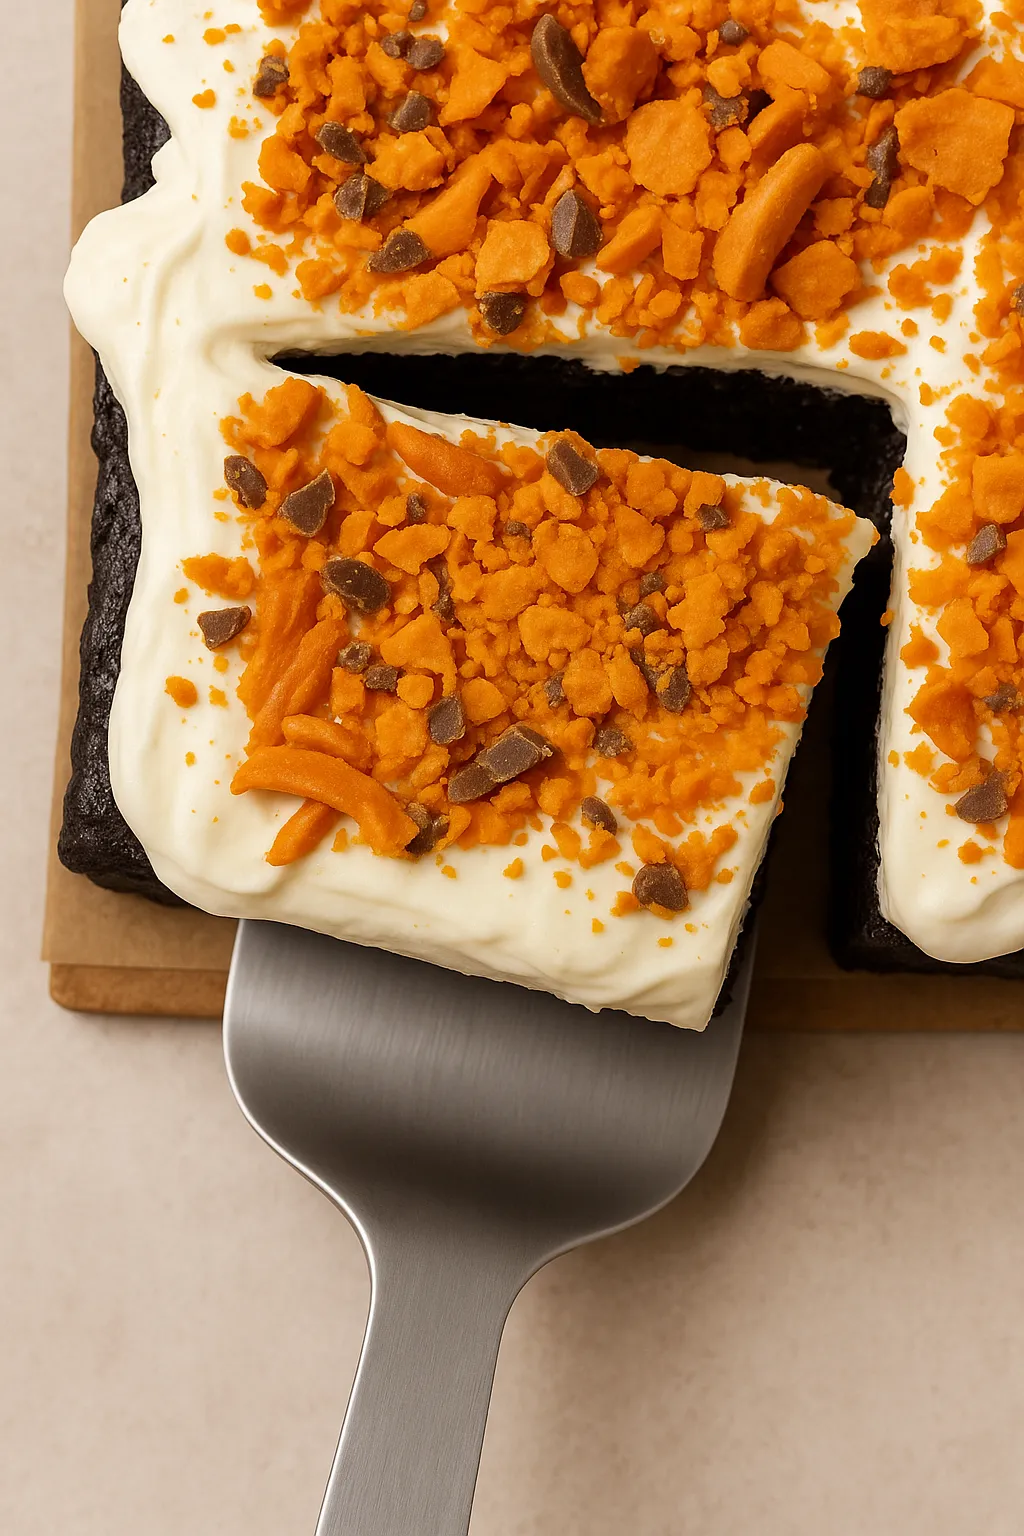
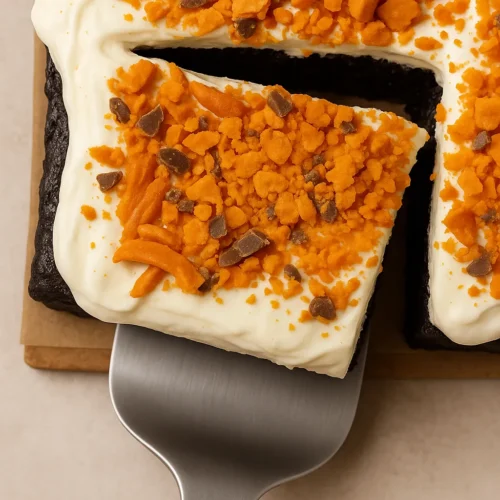
Garnishing with Butterfinger
- Crush the Candy Bars:
Chop 2 to 3 Butterfinger candy bars into small chunks. For finer bits, place the bars in a zip-top bag and gently crush with a rolling pin. - Decorate the Cake:
Sprinkle the crushed Butterfinger pieces generously over the whipped topping, distributing them evenly for crunch in every bite. For extra flair, drizzle with a little extra caramel sauce or chocolate syrup if desired. - Serve:
Slice and serve the cake straight from the pan or use the parchment overhang to lift it out and place on a serving tray. This cake is best served chilled and fresh, making it perfect for parties, potlucks, or indulgent family dinners.
Storage Instructions
Proper storage ensures that your Butterfinger Cake stays moist, flavorful, and ready to enjoy for days. Follow these tips to keep your cake at its best.
Refrigerating the Cake
Once the cake is fully assembled and topped with whipped cream and crushed Butterfingers, store it in the refrigerator. Cover the pan tightly with plastic wrap or a fitted lid to prevent the whipped topping from drying out and to preserve freshness.
- Shelf Life in the Fridge: The cake will stay fresh for up to 4–5 days when properly covered and stored in a cold refrigerator.
Freezing Instructions
If you want to make the cake ahead or store leftovers for longer:
- Pre-Freeze (Optional): Chill the cake for 1–2 hours in the fridge to firm up the whipped topping.
- Wrap and Store: Slice the cake and wrap individual pieces in plastic wrap, then place them in an airtight container or freezer bag.
- Freeze: Store in the freezer for up to 1 month.
- To Serve: Thaw individual slices in the refrigerator overnight or at room temperature for 1–2 hours. The texture of the whipped topping may change slightly, but the flavor will still be delicious.
Butterfinger Cake
Ingredients
Cake Base
- 1 box (15.25 oz) chocolate cake mix (e.g., devil’s food)
- 3 large eggs (room temperature)
- 1 cup (240 ml) water
- ½ cup (120 ml) oil
Filling
- 12 oz (1 can) sweetened condensed milk
- 12 oz (1 bottle) caramel sauce
Whipped
- 1½ cups (360 ml) cold heavy cream
- 1½ tablespoons creamy peanut butter (optional)
- ¼ cup (30 g) powdered sugar
Garnish
- 2–3 Butterfinger candy bars, chopped
Instructions
- Preheat oven to 350°F (177°C) and line a 9×13 inch pan with parchment.
- Mix cake mix, eggs, water, and oil until smooth.
- Pour into pan and bake for 20–25 minutes; cool 15–20 minutes.
- Poke holes all over the warm cake using a wooden spoon handle.
- Mix sweetened condensed milk and caramel sauce; pour over cake and spread.
- Cover and refrigerate for 1–2 hours or overnight.
- Whip cold cream with powdered sugar (and optional peanut butter) to stiff peaks.
- Spread whipped cream over the chilled cake evenly.
- Crush and sprinkle Butterfinger bars on top.
- Serve chilled; store in fridge up to 5 days or freeze slices for 1 month.
Conclusion
Butterfinger Cake is the ultimate crowd-pleasing dessert, combining the richness of chocolate cake, the indulgence of caramel, and the crunch of candy bars—all tied together with a cloud of whipped cream.
With clear instructions and simple ingredients, this recipe makes it easy to create a decadent dessert that looks impressive and tastes unforgettable.
Customize it with extra toppings, swap in different candy bars, or adjust the filling to suit your taste. However you slice it, Butterfinger Cake is bound to become a repeat favorite in your baking repertoire.