Homemade Easy Crumpet Recipe
Craving a warm, fluffy breakfast treat? My homemade easy crumpets are soft, spongy, and perfect for smothering with butter, honey, or jam. These golden delights are simpler to make than you think and don’t require any fancy ingredients. Whether it’s a lazy weekend morning or a midweek breakfast treat, these crumpets will quickly become a favorite in your kitchen.
Ingredients List
Dry Ingredients
150 g (1 cup) all-purpose flour
1/2 tsp salt
1/2 tsp white sugar
1 tsp baking powder
Yeast Mixture
1 tsp instant or active dry yeast
1 tbsp warm water
Wet Ingredients
200 ml (3/4 cup + 1 tbsp) warm water
2 tbsp unsalted butter, melted (or vegetable oil for cooking)
Required Kitchen Tools
Making crumpets is simple, but a few tools make the process even smoother:
Mixing Bowl – For combining your ingredients evenly. A medium-sized bowl works perfectly.
Whisk or Spoon – To mix the yeast and flour without overworking the batter.
Non-stick Frying Pan – A flat, non-stick pan ensures your crumpets cook evenly and brown beautifully.
Crumpet Rings or Molds – Optional but helpful for shaping your crumpets into that classic round form.
Spatula – For flipping the crumpets gently without breaking them.
Having these tools ready makes the cooking process smooth and stress-free.
Preparing the Yeast Mixture
To get the perfect rise, I always start with my yeast mixture:
In a small bowl, dissolve 1 tsp of instant or active dry yeast in 1 tbsp of warm water.
Let it sit for about 5 minutes until it becomes frothy. This step ensures your crumpets will have that airy, spongy texture.
Mixing the Batter
In a medium mixing bowl, combine the flour, baking powder, salt, and sugar.
Gradually pour in the warm water and the yeast mixture while whisking to form a smooth, thick batter.
Cover the bowl with a clean kitchen towel and leave it in a warm spot for 20–30 minutes. You’ll notice bubbles forming on the surface—that’s the magic of yeast at work.
Cooking the Crumpets
Prepping the Pan
I heat a non-stick pan over low-medium heat and lightly grease it with melted butter or oil. Patience is key here—too hot and the crumpets will burn; too low and they won’t rise properly.
Shaping and Cooking
Place crumpet rings in the pan if using, and spoon the batter into each ring until it’s about halfway full.
Cook the crumpets on low heat for 8–10 minutes. You’ll see holes forming on the surface—that’s the signature crumpet texture!
Remove the rings carefully and flip the crumpets. Cook for another 2–3 minutes to lightly brown the bottom.
Transfer them to a wire rack to cool slightly.
Serving Suggestions
Toppings and Spreads
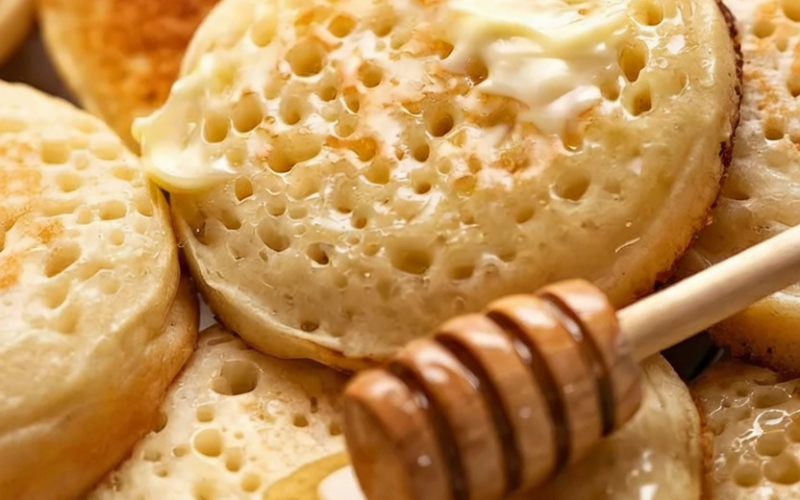
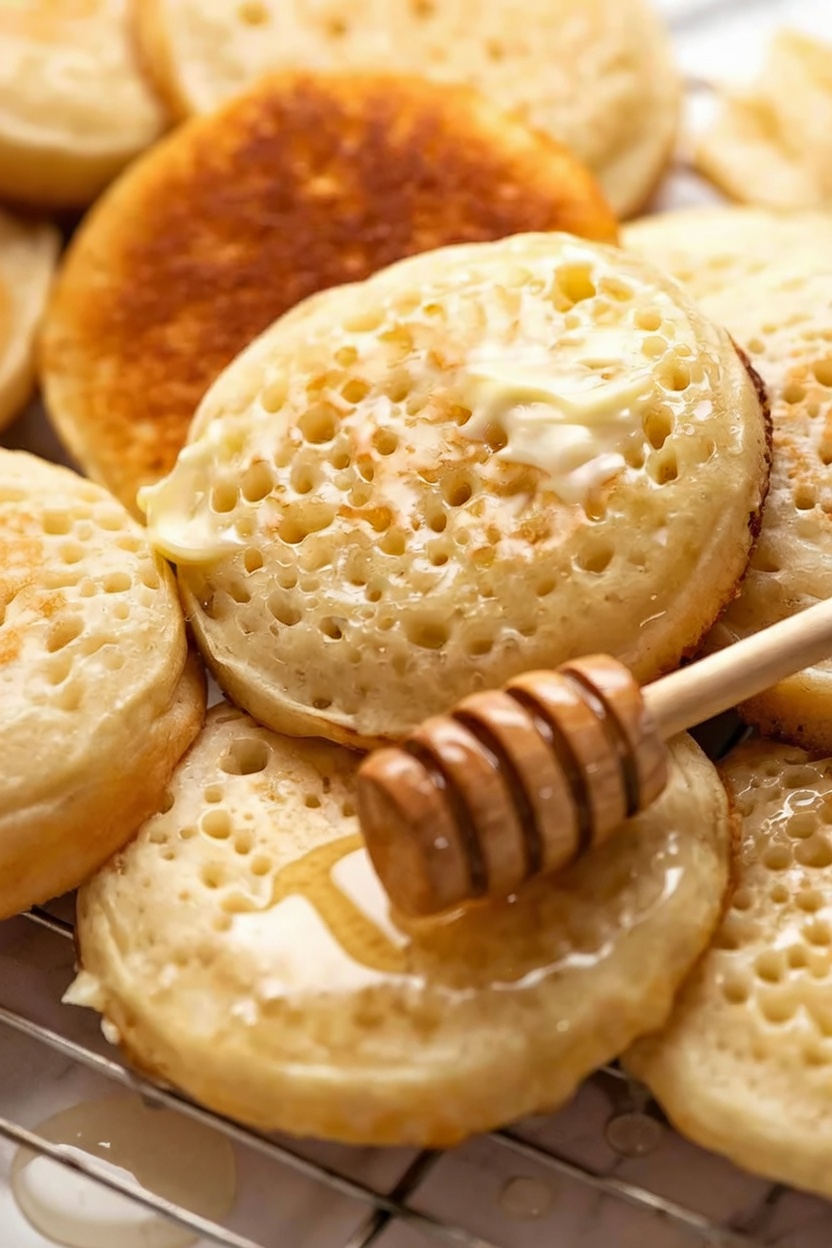
Crumpets are best enjoyed warm. I love topping mine with:
Butter – Let it melt into all the little holes for a rich, indulgent treat.
Jam or Honey – Sweet spreads enhance the soft texture.
Cheese or Nut Butter – For a savory twist, a slice of cheese or almond butter works beautifully.
Storage Instructions
Keeping Crumpets Fresh
If you have leftovers, store them in an airtight container at room temperature for 1–2 days. To reheat, simply toast them lightly in a pan or toaster—just enough to warm through without drying out.
Freezing for Later
Crumpets freeze wonderfully. Place them in a freezer-safe bag, removing excess air, and store for up to 1 month. Reheat directly from frozen in a toaster or skillet for an easy breakfast anytime.
Conclusion
Making homemade crumpets is easier than it seems, and the results are delightfully satisfying. With this simple recipe, you can enjoy soft, spongy crumpets at home anytime, topped with your favorite spreads. The key is in the batter’s rise and gentle cooking, which creates those signature holes and golden bottoms. So grab your ingredients, fire up your pan, and treat yourself to the comfort of freshly made crumpets—it’s breakfast bliss in every bite!