Easy Homemade Crescent Rolls Recipes
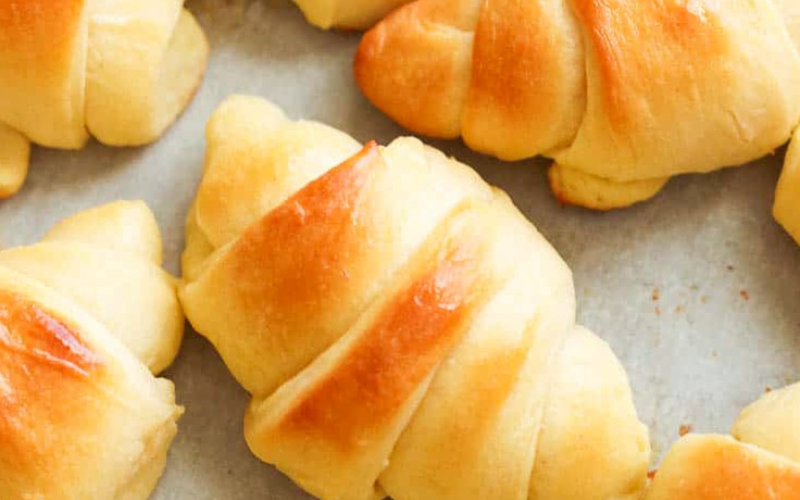
Craving soft, buttery, and flaky rolls straight from your own kitchen? These Easy Homemade Crescent Rolls are the ultimate comfort bake, perfect for breakfast, brunch, or even as a side to a hearty dinner. With a golden, pillowy texture and a hint of sweetness, they’ll rival any bakery version—but made entirely at home with simple ingredients.
Whether you enjoy them plain, stuffed with jam, or brushed with a buttery glaze, these crescent rolls are a versatile treat everyone will love. Trust me, once you make these, you’ll never go back to store-bought!
Ingredients List
Dough Ingredients
1 tablespoon (9 g) instant yeast
½ cup (120 ml) warm water (110℉ / 45℃)
½ cup (120 ml) whole milk
½ cup (120 g) butter, room temperature
½ cup (100 g) white sugar
1 teaspoon (6 g) salt
2 eggs
4 cups (480 g) all-purpose flour
Topping
3 tablespoons (42 g) melted unsalted butter
Required Kitchen Tools
Having the right tools makes baking crescent rolls so much easier. Here’s what I always keep on hand:
Stand Mixer or Hand Mixer: Kneading yeast dough can be tough, so a mixer with a dough hook saves energy and gives a perfectly smooth texture.
Mixing Bowls: Large bowls are essential for proofing and mixing the dough.
Rolling Pin: To roll the dough evenly before shaping it into crescent rolls.
Baking Sheet & Parchment Paper: Ensures the rolls bake evenly and prevents sticking.
Pastry Brush: For brushing melted butter over the rolls to achieve a golden, glossy finish.
Dough Preparation
Mixing the Ingredients
First, I combine the yeast with warm water and a pinch of sugar, letting it bloom for 5 minutes until frothy. In a large bowl, I mix the softened butter, sugar, salt, and eggs. Then, I gradually add the flour and milk, working the ingredients together until a soft, slightly sticky dough forms.
Using a dough hook or my hands, I knead the dough for about 5–7 minutes, until it’s smooth and elastic. The key here is gentle but thorough kneading—this develops the gluten and ensures soft, fluffy rolls.
Letting the Dough Rise
Once kneaded, I cover the dough with a clean kitchen towel and leave it in a warm, draft-free spot. It usually takes about 1–1.5 hours to double in size. Watching it rise is one of my favorite parts—it’s like seeing the dough come to life!
Shaping the Crescent Rolls
After the dough has risen, I gently punch it down to release excess air and turn it out onto a floured surface.
Divide and Roll: I divide the dough into two equal portions, rolling each into a large circle about ¼ inch thick.
Cut Into Triangles: Using a sharp knife or pizza cutter, I cut the circle into 8–10 triangles, depending on your preferred size.
Shape the Crescents: Starting from the wide end of each triangle, I roll the dough toward the tip, creating a crescent shape.
Prepare for Baking: I place the rolled crescents onto a parchment-lined baking sheet, leaving space between each one.
Baking the Crescent Rolls
I preheat the oven to 375℉ (190℃) while the rolls take their second rise for about 20 minutes. Just before baking, I brush each roll generously with melted butter.
The rolls bake for 15–18 minutes, until golden brown and irresistibly fragrant. The buttery aroma filling the kitchen is the hardest part to resist!

Serving and Decoration
Tips for Extra Flavor
Extra Butter: Brush the rolls again immediately after baking for an even richer flavor.
Sweet Option: Sprinkle a little sugar or cinnamon sugar on top before baking.
Savory Option: Add garlic powder or herbs to the dough for a flavorful twist.
These crescent rolls are best served warm and fresh, perfect alongside jam, honey, or even a savory dip.
Storage Instructions
Keeping Rolls Fresh
Store leftover rolls in an airtight container at room temperature for up to 2 days. They stay soft, but if they start to firm up, a quick 10–15 second microwave zap will bring them back to life.
Freezing Crescent Rolls
You can freeze unbaked shaped rolls for up to 1 month. Place them on a baking sheet until frozen, then transfer to a freezer-safe bag. When ready to bake, thaw and let rise before baking as usual.
Conclusion
Making Easy Homemade Crescent Rolls at home is easier than you think, and the results are unbeatable. Fluffy, buttery, and golden, these rolls are perfect for breakfast, brunch, or alongside any meal. Once you master this simple recipe, you can experiment with sweet or savory fillings, flavored toppings, or even use them for mini sandwiches.
Trust me, nothing beats the smell of freshly baked crescent rolls straight from your oven. Grab your ingredients, roll up your sleeves, and enjoy the joy of baking these classic, comforting treats.