Craving that buttery, flaky crunch of store-bought crackers but want something homemade and wholesome? Say hello to Homemade Ritz Crackers—a delicious, 6-ingredient recipe that brings nostalgic flavor right to your kitchen.

With simple pantry staples and no preservatives, these golden crackers are the perfect snack, you’re serving them with cheese, dips, or just enjoying them straight off the baking sheet.
Ingredients List
Creating the perfect homemade Ritz cracker involves just a handful of ingredients, but each plays a key role in achieving that signature texture and flavor. Let’s take a closer look:
Cracker Dough Ingredients
- 1 cup all-purpose flour
- 1 1/2 tsp baking powder
- 2 tsp granulated sugar
- 1/4 tsp salt
- 4 tbsp cold butter, cubed
- 1/4 cup ice water (plus more if needed)
- 1 large egg, whisked (for egg wash)
Required Kitchen Tools
Making homemade Ritz crackers doesn’t require anything fancy—just a few essential tools to make the process smooth and efficient:
- Food Processor: Speeds up the mixing process and ensures the butter is properly cut into the flour.
- Rolling Pin: Essential for achieving that thin, crisp cracker texture.
- Fluted Cookie Cutter: To get the signature Ritz cracker look. A 1.5-2 inch cutter works best.
- Fork: For pricking the crackers so they bake evenly without puffing up.
- Parchment-Lined Baking Sheet: Prevents sticking and helps bake the crackers to golden perfection.
- Pastry Brush: For brushing the egg wash on top before baking.
Dough Preparation
Crafting the dough is where the magic begins. The right mix and chill time help develop that signature buttery crisp we all love in Ritz crackers.
Mixing the Ingredients
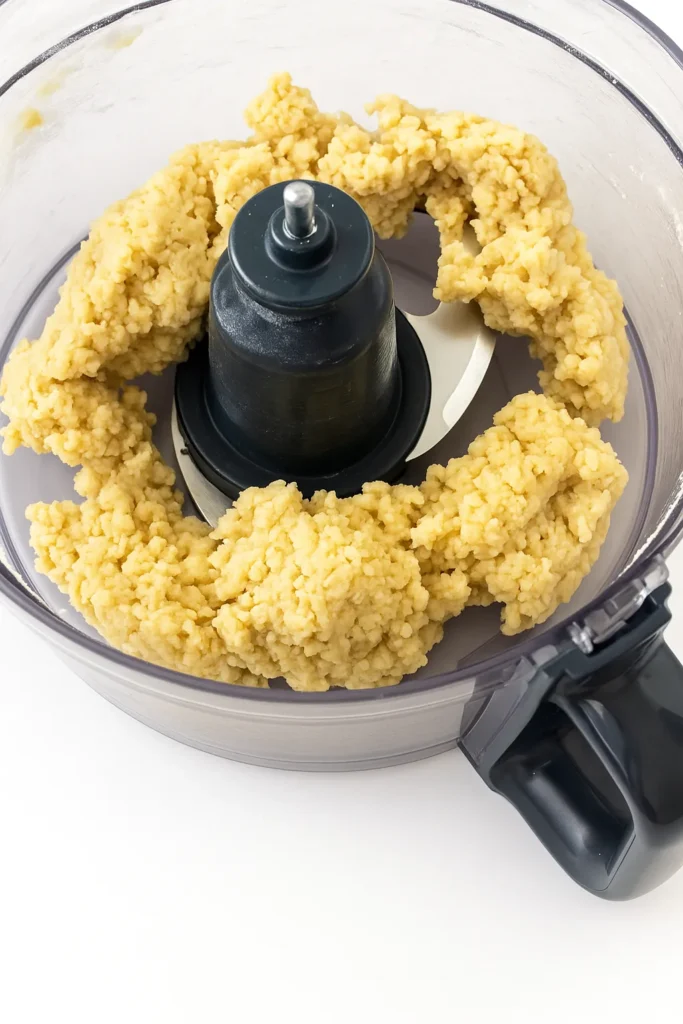
To start, add the flour, baking powder, sugar, salt, and cubed cold butter to a food processor fitted with the blade attachment. Pulse for about 30 seconds or until the mixture looks like coarse crumbs.
Slowly add in the ice water—start with 1/4 cup and pulse until the dough starts to come together. If it’s too dry, add more ice water one tablespoon at a time, pulsing in between, just until a soft dough forms.
Forming and Chilling the Dough
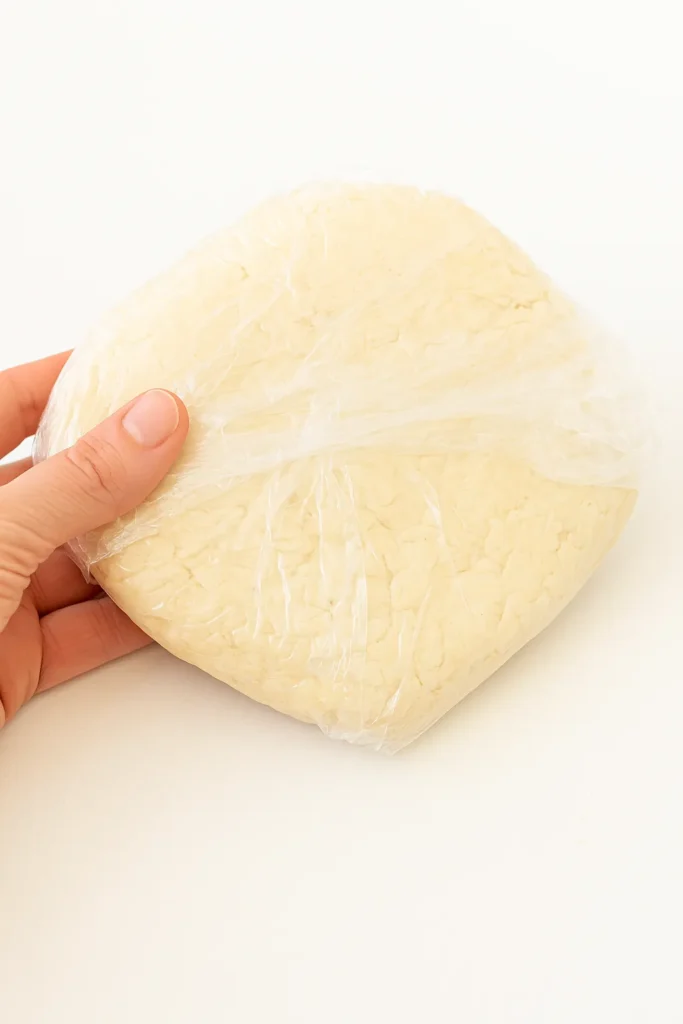
Once the dough forms, remove it from the food processor and gently shape it into a flat, round disc using your hands. Wrap the dough tightly in plastic wrap and refrigerate for at least 1 hour. This chilling time allows the butter to firm back up and makes the dough easier to roll out. For even better flavor and texture, you can chill it overnight.
Shaping the Crackers
Rolling and cutting is where your crackers start to take shape. Precision here ensures even baking and that classic cracker appearance.
- Roll the Dough:
Remove the chilled dough and transfer it to a lightly floured surface. Roll it out evenly to about 1/8-inch thickness using a rolling pin. Be patient and make sure the dough doesn’t stick—dust with more flour as needed. - Cut the Crackers:
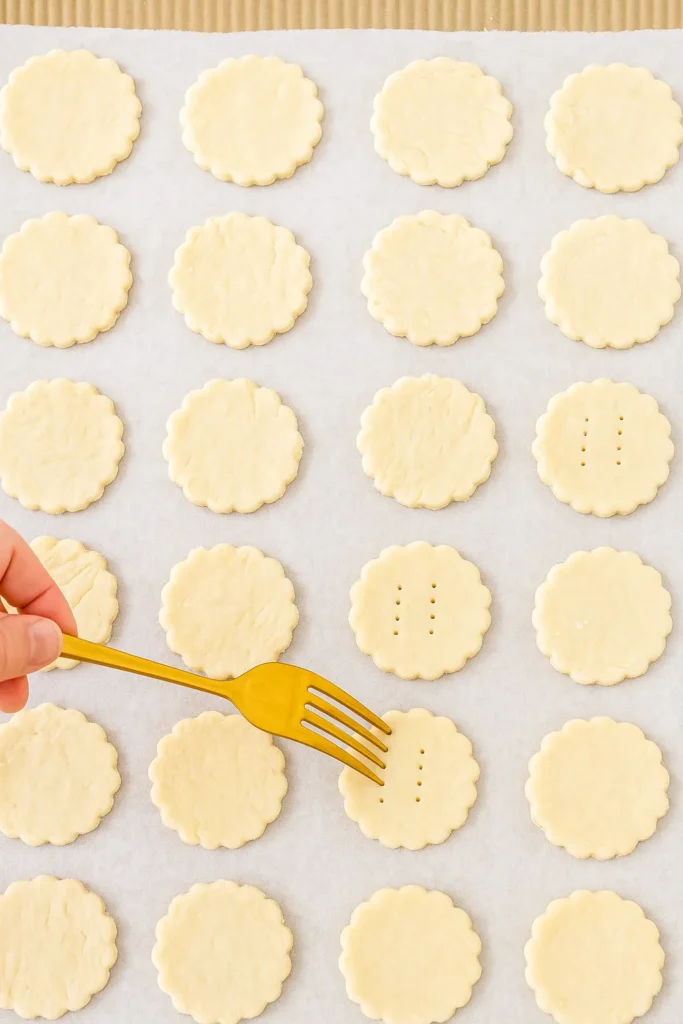
Using a small fluted cookie cutter, cut out as many crackers as possible. Transfer them to a parchment-lined baking sheet, spacing them slightly apart. - Re-Roll Scraps:
Gather the dough scraps, re-roll, and cut more crackers until all the dough is used up. Try to minimize re-rolling more than once or twice to keep the texture light and flaky. - Dock the Crackers:
Using a fork, gently prick each cracker a few times. This step helps prevent puffing during baking and gives that classic Ritz look.
Baking the Crackers
Now that your crackers are shaped and prepped, it’s time to bake them to golden, crispy perfection. This step brings out that iconic buttery aroma and crunch that makes Ritz-style crackers so irresistible.
Oven Temperature and Baking Time
Preheat your oven to 400°F (200°C). Make sure it’s fully preheated before the crackers go in to ensure even browning.
- Egg Wash:
Before baking, lightly brush the tops of the crackers with the whisked egg. This not only gives them a beautiful golden sheen but also helps develop a crisp, glossy surface. - Baking Time:
Bake the crackers in the center of the oven for 10 minutes, or until they are a light golden brown. Keep an eye on them during the last few minutes—thin crackers can turn too dark quickly. - Cooling Process:
Once baked, remove the crackers from the oven and let them cool on the baking sheet for 5–10 minutes. As they cool, they will crisp up even more. Don’t worry if they seem slightly soft at first—cooling is key to that final crunch.
Serving and Presentation
These homemade Ritz crackers are delicious on their own, but also perfect for pairing and snacking.
Serving Suggestions
- Cheese Boards: Add them to a charcuterie spread with cheeses, cured meats, and spreads.
- Dips & Spreads: Serve alongside hummus, guacamole, or pimento cheese for a party hit.
- Snacking: Toss a handful into your lunchbox or enjoy with a warm bowl of soup.
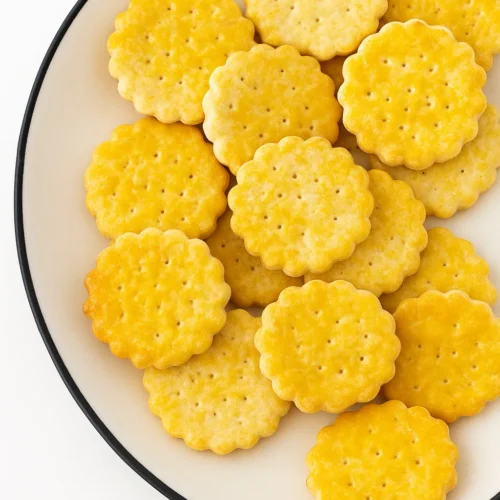
They look especially inviting when served in a rustic bowl or laid out on a wooden serving board.
Storage Instructions
Once your crackers have cooled and crisped up, you’ll want to store them properly to maintain their texture and freshness.
How to Keep Crackers Fresh
After cooling completely, store your homemade Ritz crackers in an airtight container at room temperature. They’ll stay fresh and crunchy for up to 5–7 days. Be sure the container is truly airtight—moisture is the enemy of crispness.
Freezing Ritz Crackers
Want to make a big batch and enjoy them later? These crackers freeze surprisingly well.
- How to Freeze: Place cooled crackers in a freezer-safe zip-top bag or airtight container. Layer with parchment paper if stacking.
- Shelf Life: Store in the freezer for up to 1 month.
- To Serve Again: Let them thaw at room temperature for 15–20 minutes. You can even pop them into a 300°F oven for 5 minutes to refresh the crunch.
Homemade Ritz Crackers (6 Ingredients!)
Ingredients
Cracker Dough
- 1 cup all-purpose flour
- 1 1/2 tsp baking powder
- 2 tsp granulated sugar
- 1/4 tsp salt
- 4 tbsp cold butter, cubed
- 1/4 cup ice water (plus more if needed)
- 1 large egg, whisked (for egg wash)
Instructions
- In a food processor with the blade attachment, add flour, baking powder, sugar, salt, and cubed cold butter. Pulse for about 30 seconds, or until the mixture resembles coarse crumbs.
- Slowly add 1/4 cup ice water while pulsing until a dough starts to form. If the dough is too dry, add more ice water 1 tablespoon at a time.
- Remove the dough, shape it into a flat disc, and wrap it in plastic wrap. Refrigerate for at least 1 hour (or overnight for best results).
- When ready to bake, preheat the oven to 400°F (200°C) and line a baking sheet with parchment paper.
- Roll out the chilled dough on a lightly floured surface to about 1/8-inch thickness. Use a small fluted cookie cutter to cut out crackers. Transfer to the prepared baking sheet. Re-roll scraps to use all the dough.
- Prick each cracker a few times with a fork to prevent puffing during baking.
- Lightly brush the tops of the crackers with whisked egg for a glossy, golden finish.
- Bake for 10 minutes or until golden brown.
- Let the crackers cool on the baking sheet for about 10 minutes. They’ll crisp up more as they cool. Enjoy!
Conclusion
Homemade Ritz crackers prove that delicious snacks don’t need a laundry list of ingredients.
With just six simple components and a little time, you can bake up a batch of buttery, golden crackers that rival anything from a box.
And the best part? You made them yourself—no preservatives, no mystery ingredients, just pure, wholesome goodness. So grab your apron, roll out that dough, and bring a little homemade magic to your snack game.