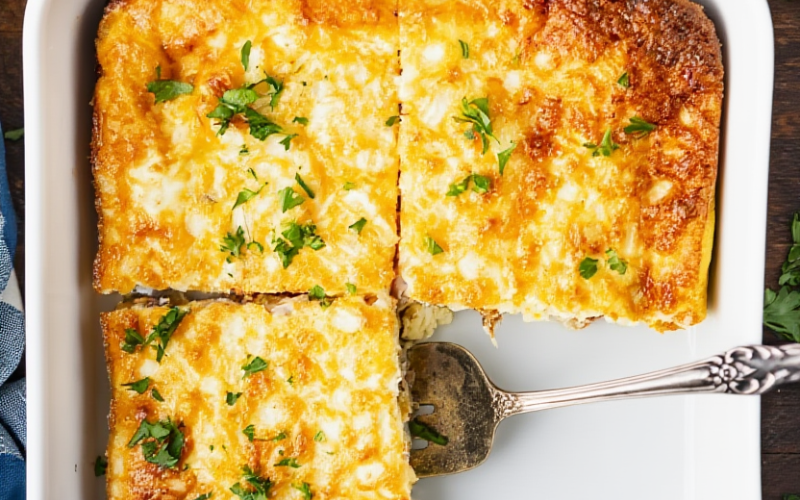
Easy Crustless Mini Quiche Recipes

Craving a quick, protein-packed breakfast or a light snack? These Easy Crustless Mini Quiches are my go-to recipe whenever I want something tasty, healthy, and fuss-free. Packed with eggs, cheese, and your favorite veggies or meats, they’re perfect for meal prep, brunch, or even a party platter. Plus, because they’re crustless, they’re lower in carbs but full of flavor—an all-around win!
Ingredients List
Here’s everything you’ll need to whip up these mini quiches. I like to keep it flexible so you can use whatever you have in the fridge.
Main Ingredients
6 large eggs
3 tablespoons milk
1/2 teaspoon mixed herbs
1/4 teaspoon salt
1/4 teaspoon black pepper
1/2 cup chopped cooked bacon, ham, or shredded chicken
1 cup cheese (I love Tasty cheese for its meltiness)
Optional Additions
For extra flavor and nutrition, you can add finely chopped:
Capsicum
Tomato
Spring onions
Onions
Broccoli
Grated carrot
Corn
Optional Garnish
Chopped fresh chives or parsley for a pop of color
Required Kitchen Tools
Having the right tools makes these mini quiches a breeze:
Muffin Tin or Silicone Cups – Perfect for shaping individual mini quiches.
Mixing Bowl and Whisk – For beating the eggs and milk together.
Measuring Spoons and Cups – Ensures your flavors are balanced.
Oven or Toaster Oven – To bake these little wonders to perfection.
Knife and Cutting Board – To chop your veggies, meat, or herbs.
With these ingredients and tools, you’re ready to make a batch of mini quiches that are as tasty as they are convenient.
Preparing the Egg Mixture
The key to light, fluffy mini quiches is properly mixing your eggs and seasonings. Here’s how I do it:
Beating the Eggs
Crack all 6 eggs into a large mixing bowl.
Add 3 tablespoons of milk, 1/2 teaspoon of mixed herbs, 1/4 teaspoon salt, and 1/4 teaspoon black pepper.
Using a whisk (or a fork if you don’t have one handy), beat the mixture until it’s smooth, slightly frothy, and well combined.
Adding the Fillings
Fold in 1/2 cup of chopped cooked bacon, ham, or shredded chicken.
Add 1 cup of your favorite cheese. I usually use Tasty cheese because it melts beautifully and gives the quiches that gooey, golden top.
Now’s the fun part—add any finely chopped veggies you like, such as capsicum, tomato, spring onions, or even grated carrot. I often mix a few different veggies to keep the quiches colorful and flavorful.
Preparing the Muffin Tin
Preheat your oven to 180°C (350°F).
Lightly grease a muffin tin with butter or non-stick spray, or use silicone muffin cups for easy removal.
Pour the egg and filling mixture evenly into the muffin cups, filling them about 3/4 full to leave room for the quiches to puff up while baking.
At this stage, your mini quiches are ready to go into the oven for baking.
Baking the Mini Quiches
Baking is where the magic happens. Here’s how I ensure my mini quiches come out fluffy, golden, and perfectly set every time.
Oven Baking
Place the muffin tin in the preheated oven at 180°C (350°F).
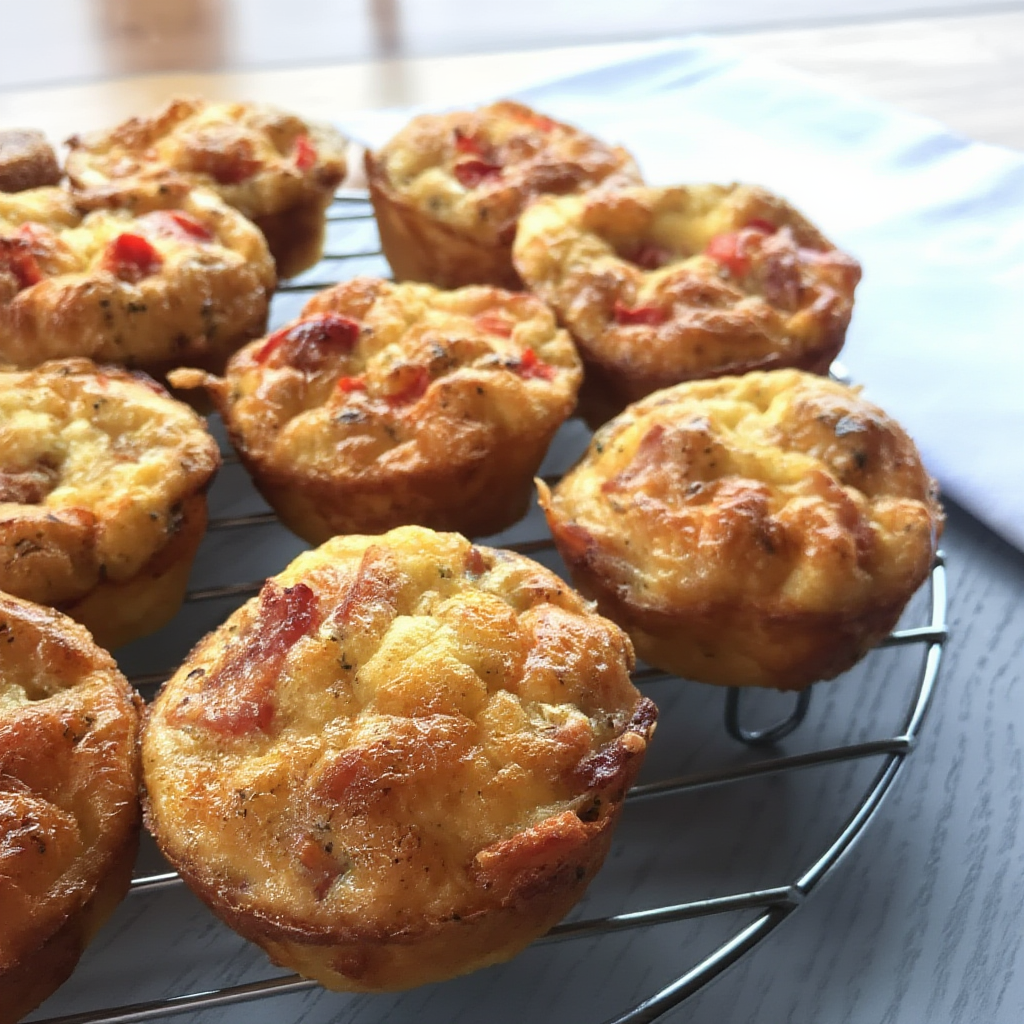
Bake for 18–22 minutes, depending on your oven and the size of your muffin cups. Keep an eye on them—the tops should turn lightly golden.
To check for doneness, insert a toothpick or skewer into the center of a quiche. If it comes out clean, they’re ready. If not, bake for an extra 2–3 minutes and check again.
Tips for Fluffy Quiches
Don’t overfill: Leave about 1/4 inch at the top of each muffin cup so the quiches can rise without spilling over.
Even mixing: Make sure your eggs, cheese, and fillings are evenly combined. This ensures every mini quiche has the same delicious flavor in every bite.
Rest before removing: Let the quiches sit for 2–3 minutes after taking them out of the oven. This helps them set, making them easier to remove from the tin without breaking.
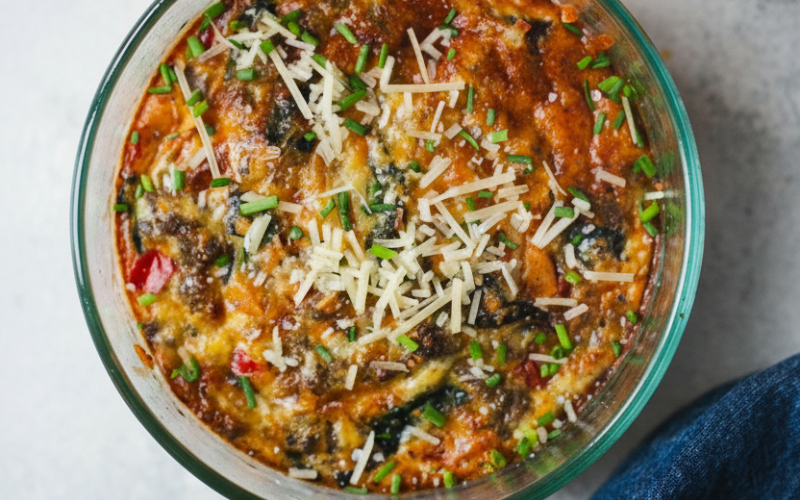
Optional Garnish
Once cooled slightly, I like to sprinkle chopped fresh chives or parsley on top for a fresh burst of color and flavor. They make the quiches look as good as they taste!
Serving and Enjoying
These mini quiches are incredibly versatile and perfect for any time of day. I love serving them:
For Breakfast or Brunch: Warm from the oven with a side of fresh salad or fruit.
As a Snack or Party Bite: Bite-sized and easy to pick up, they’re perfect for gatherings or lunchboxes.
Meal Prep: Make a batch on Sunday, and you’ve got a week of grab-and-go breakfasts or snacks.
You can also get creative—top them with extra cheese, a dollop of sour cream, or a sprinkle of paprika for a gourmet touch.
Storage Instructions
Keeping Mini Quiches Fresh
At Room Temperature: Let the quiches cool completely, then store in an airtight container for up to 2 days.
In the Fridge: For longer freshness, store them in the fridge for up to 4 days. Reheat in the microwave or oven before serving.
Freezing: I often freeze mini quiches for up to 1 month. Place them in a freezer-safe container or bag, and thaw in the fridge or warm in the oven when needed.
Reheating Tips
Oven: 160°C (320°F) for 5–7 minutes gives a nice crisp top.
Microwave: 30–60 seconds per quiche works well, but the tops won’t stay as crisp.
Conclusion
Mastering these Easy Crustless Mini Quiches has completely changed the way I approach quick meals. They’re simple to make, endlessly customizable, and always a crowd-pleaser. From protein-packed breakfasts to elegant party snacks, they fit any occasion.
With a few eggs, cheese, and your favorite fillings, you can whip up a batch in under 30 minutes. The crustless version keeps things light without sacrificing flavor, making these mini quiches a staple in my kitchen.
So grab your muffin tin, mix up your favorite ingredients, and bake your way to fluffy, cheesy, irresistible mini quiches—your taste buds will thank you!