Craving a classic appetizer with a modern twist? Dive into the world of Instant Pot Deviled Eggs, a delightful treat that’s sure to impress at your next gathering.
These creamy, flavorful bites feature perfectly cooked eggs with velvety yolk filling, seasoned to perfection.
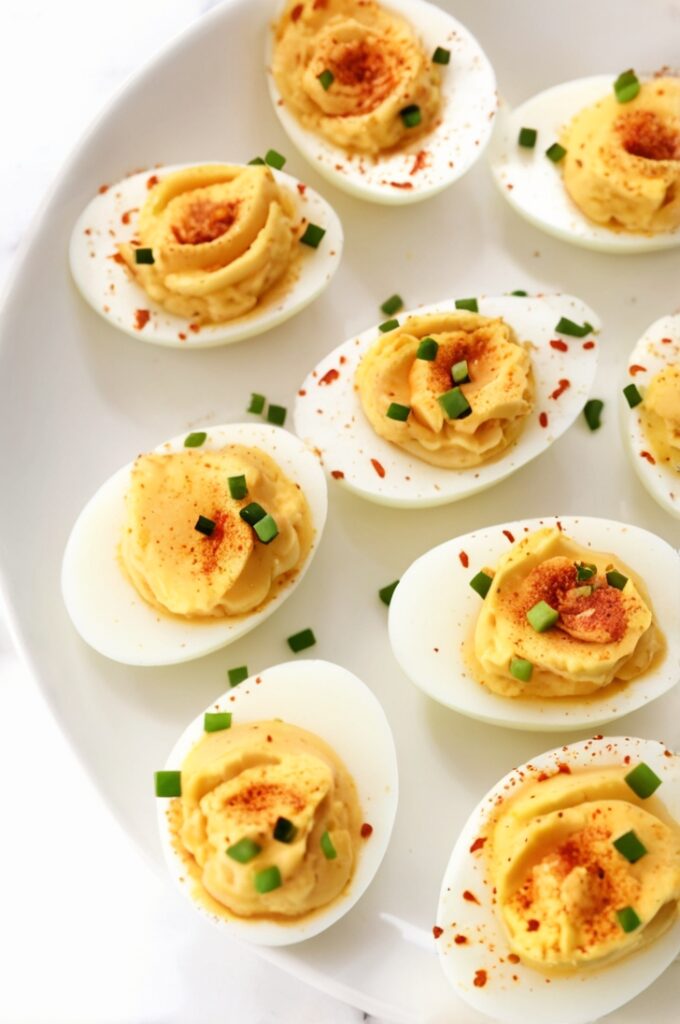
You can stick with the traditional mustard and mayo combination or explore additions like bacon, sriracha, or fresh herbs—there’s an Instant Pot Deviled Egg variation for every palate.
Ingredients List
Creating perfect Instant Pot Deviled Eggs requires a few key components to achieve the ideal balance of flavors. Let’s break down the ingredients needed for each element of this delicious appetizer.
Egg Base Ingredients
- 6 large eggs
- 1 cup water (for the Instant Pot)
Filling Ingredients
- 1/3 cup mayonnaise
- 1 teaspoon dijon mustard
- 1 tablespoon dill pickle, minced
- 1 tablespoon red onion, minced
- 1/4 teaspoon black pepper
- 1/4 teaspoon salt
- 1/4 teaspoon paprika (plus extra for garnish)
- Fresh chives for garnish (optional)
Required Kitchen Tools
When preparing Instant Pot Deviled Eggs, having the right kitchen tools can make the process smoother and more enjoyable. Here are the essential tools you will need:
- Instant Pot: The star of this recipe, your Instant Pot will cook the eggs perfectly with minimal effort.
- Steamer Basket: This fits inside your Instant Pot and keeps the eggs from sitting directly in the water.

- Tongs: Essential for safely removing the hot eggs from the Instant Pot without burning yourself.
- Large Bowl with Ice Water: Preparing an ice bath is crucial for stopping the cooking process and making the eggs easier to peel.
- Small Bowl: For mixing the egg yolk filling to a creamy consistency.
- Fork: For mashing the egg yolks until smooth.
- Piping Bag or Spoon: For filling the egg whites with the yolk mixture – a piping bag creates a more elegant presentation.

- Serving Platter: To arrange and present your finished deviled eggs.
Having these tools on hand will set you up for a successful Instant Pot Deviled Eggs experience.
Egg Preparation
Preparing eggs in the Instant Pot is a game-changer for deviled eggs. This method ensures consistently perfect hard-boiled eggs that are easy to peel, saving you time and frustration. Follow these steps to achieve egg perfection every time.
Setting Up the Instant Pot
To begin the egg preparation process, properly set up your Instant Pot for optimal results. Place the steamer basket inside the Instant Pot’s inner pot.
This elevates the eggs above the water, allowing them to steam rather than boil, resulting in more evenly cooked eggs. Add 1 cup of water to the bottom of the pot, making sure not to submerge the steamer basket.
Carefully arrange the eggs in a single layer on the steamer basket, avoiding overcrowding to ensure even cooking. Close the Instant Pot lid securely and set the pressure valve to the “sealing” position to build proper pressure during cooking.
Cooking and Cooling the Eggs
After setting up the Instant Pot, select the “Pressure Cook” or “Manual” function and set the timer for 5 minutes on HIGH pressure. The Instant Pot will take a few minutes to come to pressure before the cooking timer begins.
Once the cooking cycle completes, allow the pressure to release naturally for about 5 minutes. This natural release period continues the cooking process gently. After 5 minutes, carefully turn the pressure valve to “venting” to release any remaining pressure.
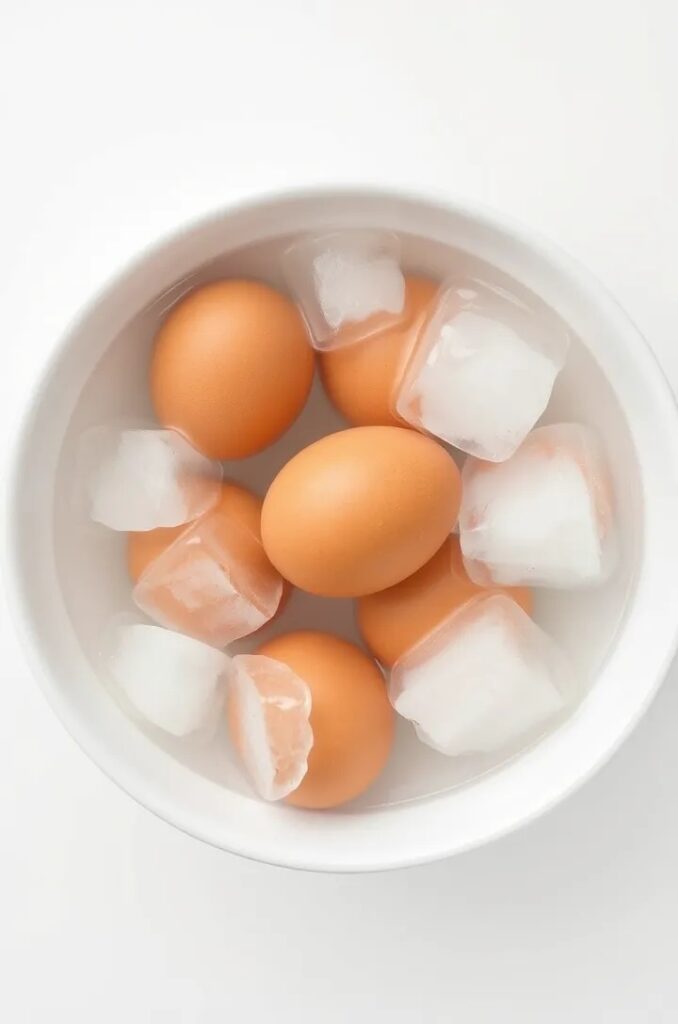
When it’s safe to open the lid, immediately transfer the eggs to the prepared ice bath using tongs. The ice bath rapidly stops the cooking process, preventing the gray ring that can form around overcooked yolks.
Let the eggs cool in the ice bath for at least 5 minutes. This cooling period not only stops the cooking but also makes the eggs significantly easier to peel. The temperature shock causes the egg to contract away from the shell, creating separation that results in effortlessly smooth peeling.
Creating the Filling
The creamy, flavorful filling is the heart of great deviled eggs. This section guides you through preparing a perfectly balanced filling that will delight your taste buds with every bite.
Preparing the Egg Yolks
To begin creating the filling, carefully peel the cooled eggs by gently tapping them on a hard surface to crack the shell, then rolling them between your hands to loosen the shell pieces.
Start peeling from the wider end of the egg where the air pocket is located for easier removal. After peeling, rinse the eggs briefly under cool water to remove any small shell fragments that might remain.
Slice each egg in half lengthwise using a sharp knife. Gently remove the yolks by carefully pressing on the back of each egg white half, allowing the yolk to pop out cleanly. Place all the yolks in a small mixing bowl for further preparation.
For the smoothest filling texture, mash the yolks thoroughly with a fork until they resemble fine crumbs with no large pieces remaining. Breaking down the yolks at this stage ensures a creamy final texture without lumps.
Mixing the Filling Ingredients
Once the yolks are properly mashed, begin incorporating the mayonnaise gradually. Add it a spoonful at a time, mixing well after each addition until you achieve a smooth, creamy consistency. This gradual approach prevents the filling from becoming too runny while ensuring all lumps are eliminated.
After achieving the desired consistency with the mayonnaise, add the dijon mustard, which provides a tangy depth of flavor. Then incorporate the minced dill pickle and red onion, which add texture and bright, complementary flavors. Season the mixture with salt, pepper, and paprika, stirring thoroughly to distribute all ingredients evenly throughout the filling. Taste the mixture and adjust the seasonings if necessary to balance the flavors perfectly.
For those who prefer a more refined presentation, transfer the finished filling to a piping bag fitted with a star tip. If you don’t have a piping bag, you can achieve a similar effect by using a resealable plastic bag with one corner snipped off.
Alternatively, simply use two small spoons to fill the egg whites with the yolk mixture. The filling can be made slightly ahead of time and refrigerated for up to 30 minutes before assembling, but avoid preparing it too far in advance as the flavors may intensify.
Assembling the Deviled Eggs
Assembling your deviled eggs is where precision meets presentation. This stage transforms your prepared components into an elegant appetizer worthy of any gathering. Follow these steps to create deviled eggs that look as good as they taste.
Filling the Egg Whites
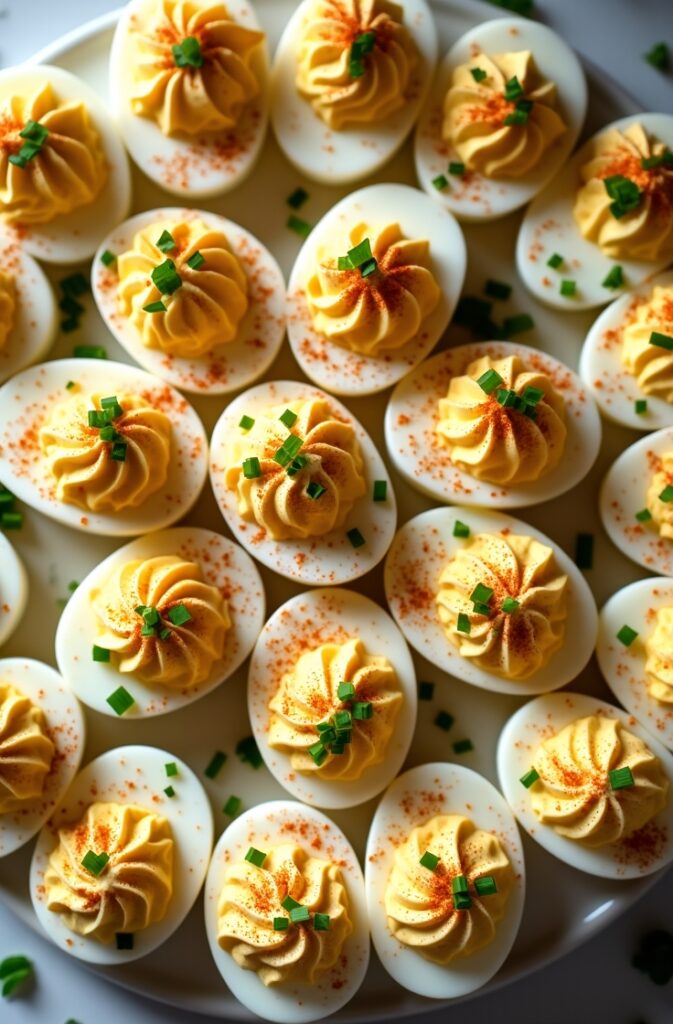
With your creamy yolk mixture prepared, it’s time to fill the egg white halves. If using a piping bag, hold it perpendicular to the egg white cavity and apply gentle, even pressure while moving in a circular motion from the outside toward the center.
This technique creates an attractive spiral pattern that adds visual appeal. Fill each cavity generously, allowing the mixture to rise slightly above the surface of the egg white for an abundant look.
If you’re using a spoon instead, place a heaping spoonful of the yolk mixture into each egg white half, then use the back of the spoon to smooth the surface gently.
For either method, ensure you distribute the filling evenly among all the egg white halves to maintain consistency in both appearance and flavor. Work methodically through all the egg whites, placing each completed deviled egg on your serving platter as you go.
Garnishing and Presentation
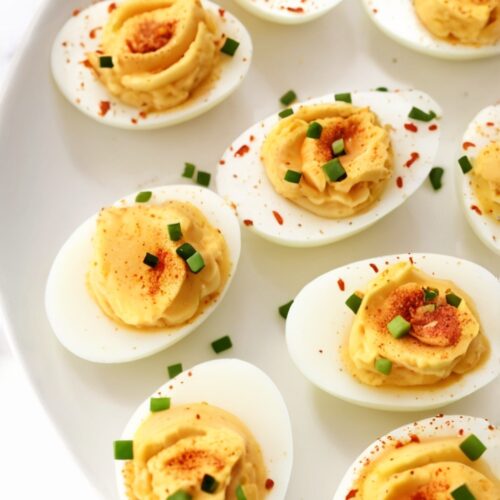
The final step in creating impressive Instant Pot Deviled Eggs is the garnishing, which adds both flavor and visual appeal. Lightly sprinkle additional paprika over each filled egg for a pop of color and subtle smoky flavor.
For a more decorative touch, use a small sieve to dust the paprika evenly over the eggs, creating a professional-looking finish.
If desired, top each egg with a small piece of fresh chive or finely minced chive sprinkles. The bright green color creates a beautiful contrast against the yellow filling and red paprika, while adding a mild onion flavor that complements the filling.
For special occasions, consider additional garnish options such as tiny bacon crumbles, small capers, or delicate dill fronds.
Arrange the completed deviled eggs on a serving platter in a circular pattern or neat rows, depending on the platter shape. For the best presentation, avoid overcrowding the eggs, allowing some space between each piece.
If transporting to another location, consider using a specialized deviled egg carrier with individual compartments to prevent shifting and maintain the beautiful presentation you’ve created.
Serving and Storage
Properly serving and storing your Instant Pot Deviled Eggs ensures they remain fresh, safe to eat, and visually appealing. These guidelines will help you present and preserve your deviled eggs for maximum enjoyment.
Serving Suggestions
Deviled eggs make an excellent addition to a variety of occasions and meal types. Serve them as an appetizer before a dinner party, as part of a holiday spread, or as a protein-rich snack at casual gatherings.
For a sophisticated presentation, serve the deviled eggs on a bed of fresh microgreens or small lettuce leaves, which adds visual interest and prevents the eggs from sliding around on the platter.
Consider temperature when serving deviled eggs. They should be served chilled but not ice cold, as extreme cold can dull the flavors. Remove the eggs from refrigeration about 15-20 minutes before serving to allow them to come to a slightly cool room temperature for optimal flavor.
If serving outdoors during warm weather, place the serving platter on a bed of ice to maintain food safety without freezing the eggs completely.
Pair your deviled eggs with complementary foods such as fresh crudités, crisp crackers, or charcuterie selections. For beverages, deviled eggs pair well with sparkling wine, crisp white wines, light beers, or non-alcoholic options like sparkling water with citrus. The smooth, rich texture of the eggs contrasts beautifully with these effervescent drinks, creating a balanced tasting experience.
Storage Instructions
While deviled eggs are best enjoyed fresh, proper storage allows you to prepare them in advance or save leftovers safely. After preparing your deviled eggs, they can be stored in the refrigerator for up to two days while maintaining good quality.
To store them properly, place the completely assembled deviled eggs in a single layer in an airtight container. Avoid stacking the eggs to prevent damaging their appearance.
If you need to prepare components ahead of time, consider storing the peeled egg white halves and the filling separately. The egg white halves can be wrapped in damp paper towels and refrigerated, while the filling can be kept in a piping bag or airtight container.
This method prevents the egg whites from drying out and allows you to assemble fresh deviled eggs just before serving. When ready to serve, pipe or spoon the filling into the egg whites and add the garnishes for the freshest presentation.
For transportation to events, use a specialized deviled egg carrier with individual compartments, or create your own by lining a container with a non-slip liner or paper towel to prevent shifting.
If traveling long distances, consider packing the filling and egg whites separately and assembling on site for the best presentation. Always keep deviled eggs refrigerated or on ice during transport and serving to maintain food safety.
Recipe Variations
The classic Instant Pot Deviled Eggs recipe serves as an excellent foundation for creative variations that can suit different taste preferences and dietary needs. Here are some delicious alternatives to try:
Flavor Enhancements
Expand your deviled egg repertoire with these flavorful variations:
- Bacon Lovers: Add 2 tablespoons of crispy, crumbled bacon to the yolk mixture and garnish with additional bacon bits for a smoky, savory twist.
- Spicy Southwest: Incorporate 1 teaspoon of hot sauce or 1/2 teaspoon of cayenne pepper into the filling, and garnish with a small slice of jalapeño for heat seekers.
- Mediterranean Style: Mix in 1 tablespoon of finely chopped sun-dried tomatoes and 1 teaspoon of fresh basil, then top with a small piece of feta cheese for a Mediterranean-inspired flavor profile.
- Avocado Blend: Replace half the mayonnaise with ripe, mashed avocado and add 1/2 teaspoon of lime juice for a healthier, creamy variation with a hint of citrus.
Dietary Adaptations
Accommodate various dietary needs with these simple modifications:
- Dairy-Free Option: Substitute the traditional mayonnaise with a plant-based mayo alternative for a completely dairy-free version that maintains the creamy texture.
- Low-Calorie Version: Use Greek yogurt in place of mayonnaise to reduce calories while adding protein and a pleasant tanginess to the filling.
- Keto-Friendly: Add an extra tablespoon of mayonnaise and 1 teaspoon of olive oil to increase the healthy fat content for those following a ketogenic diet.
- Herb Garden: For a fresh, lighter taste, incorporate 1 tablespoon of mixed fresh herbs such as dill, chives, and parsley into the filling.
Instant Pot Deviled Eggs
Ingredients
- 6 large eggs
- 1 cup water (for the Instant Pot)
- 1/3 cup mayonnaise
- 1 teaspoon dijon mustard
- 1 tablespoon dill pickle, minced
- 1 tablespoon red onion, minced
- 1/4 teaspoon black pepper
- 1/4 teaspoon salt
- 1/4 teaspoon paprika (plus extra for garnish)
- Fresh chives for for garnish (optional)
Instructions
Instant Pot
- The star of this recipe, your Instant Pot will cook the eggs perfectly with minimal effort.
Steamer Basket
- This fits inside your Instant Pot and keeps the eggs from sitting directly in the water.
Tongs
- Essential for safely removing the hot eggs from the Instant Pot without burning yourself.
Large Bowl with Ice Water
- Preparing an ice bath is crucial for stopping the cooking process and making the eggs easier to peel.
Small Bowl
- For mixing the egg yolk filling to a creamy consistency.Fork: For mashing the egg yolks until smooth.
Piping Bag or Spoon
- For filling the egg whites with the yolk mixture – a piping bag creates a more elegant presentation.
Serving Platter
- To arrange and present your finished deviled eggs.
Conclusion
Mastering Instant Pot Deviled Eggs opens up a world of delightful possibilities for entertaining and everyday snacking.
From the time-saving pressure cooking method to the creamy, flavorful filling, these bite-sized treats represent the perfect balance of convenience and gourmet appeal.
By following the detailed instructions provided, you can easily recreate this classic appetizer with modern efficiency in your own kitchen.