Easy Garlic Knots Recipe From Scratch
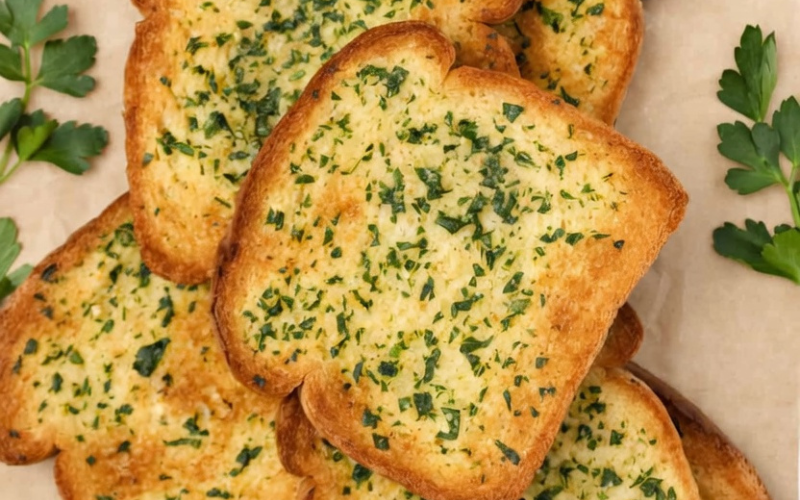
Craving warm, buttery, bakery-style bread straight from your oven? These Easy Garlic Knots From Scratch are soft, fluffy, and coated in rich garlic butter with fresh parsley. I love making these homemade garlic knots as a side for pasta night, game day snacks, or whenever I need a quick crowd-pleasing appetizer. The dough is simple, the knots are fun to shape, and the flavor is absolutely irresistible.
If you’ve ever wanted to learn how to make garlic knots from scratch, this step-by-step recipe will guide you through the entire process with ease.
Ingredients List
Dough Ingredients (From Scratch)
1 package (2 1/4 teaspoons) active dry yeast
1 teaspoon sugar
7/8 cup (207 ml) warm water (105°F to 115°F)
2 1/4 cups (300 g) bread flour (plus more for flouring the work surface and your hands)
1 teaspoon salt
1 tablespoon extra virgin olive oil (plus more for greasing the bowl and brushing the knots)
OR – If Using Store-Bought Dough
14 ounces pizza dough
Garlic Butter Coating
5 tablespoons unsalted butter
4 cloves garlic, minced
1/4 cup fresh parsley, minced
1 teaspoon salt
Required Kitchen Tools
When I make homemade garlic knots, having the right tools makes the process smooth and enjoyable:
Mixing Bowl – For activating the yeast and mixing the dough.
Measuring Cups and Spoons – Precision ensures soft, fluffy knots.
Wooden Spoon or Dough Hook – For combining and kneading the dough.
Baking Sheet – To bake the knots evenly.
Parchment Paper – Prevents sticking and ensures easy cleanup.
Small Saucepan – For preparing the garlic butter coating.
Pastry Brush – To generously coat each knot with garlic butter.
Dough Preparation
Making garlic knots from scratch is easier than you think. I always start with properly activating the yeast to ensure a soft, airy texture.
Mixing the Ingredients
In a large mixing bowl, I combine the warm water, sugar, and active dry yeast. I let it sit for about 5–10 minutes until it becomes foamy. This tells me the yeast is active and ready.
Next, I add the bread flour, salt, and olive oil. I mix everything together until a shaggy dough forms.
Kneading and Letting the Dough Rise
I transfer the dough to a lightly floured surface and knead it for about 8–10 minutes until smooth and elastic. If using a stand mixer, I knead with a dough hook for about 5–6 minutes on medium speed.
Then, I place the dough in a lightly greased bowl, cover it with a clean kitchen towel, and let it rise in a warm place for about 1 hour, or until doubled in size.
If I’m using store-bought pizza dough, I skip this step and move straight to shaping.
Shaping the Garlic Knots
Shaping is my favorite part — it’s simple and fun!
Divide the Dough:
Once risen, I gently punch down the dough and divide it into 12 equal pieces.Roll Into Ropes:
I roll each piece into a rope about 6–8 inches long.Tie Into Knots:
I tie each rope into a simple knot, tucking the ends underneath.Second Rise:
I place the knots on a parchment-lined baking sheet, cover lightly, and let them rest for 20–30 minutes until slightly puffy.
This second rise ensures soft and fluffy garlic knots.
Baking the Garlic Knots
I preheat my oven to 400°F (200°C).
Before baking, I lightly brush the tops with olive oil. Then I bake the knots for 15–20 minutes, or until golden brown on top.
The aroma at this stage is absolutely incredible.
Preparing the Garlic Butter Coating
While the knots bake, I prepare the garlic butter.
In a small saucepan over low heat, I melt the unsalted butter. I add the minced garlic and cook gently for about 1–2 minutes — just until fragrant. I’m careful not to brown the garlic.
Then I stir in the salt and freshly minced parsley.
Coating the Garlic Knots
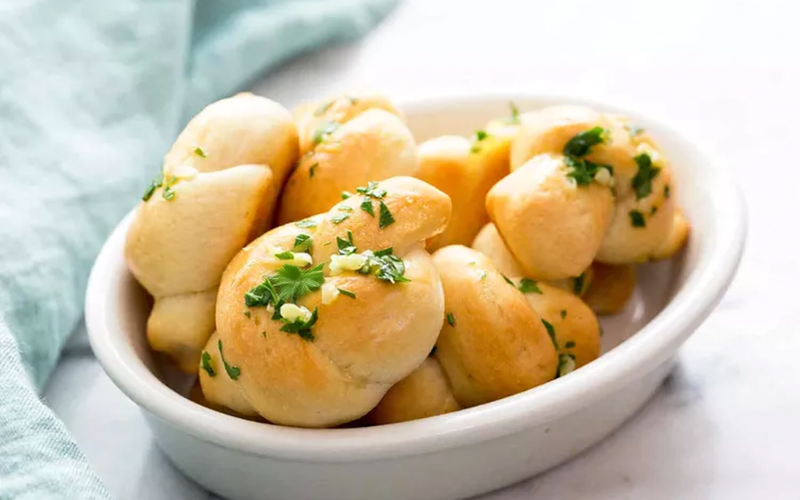
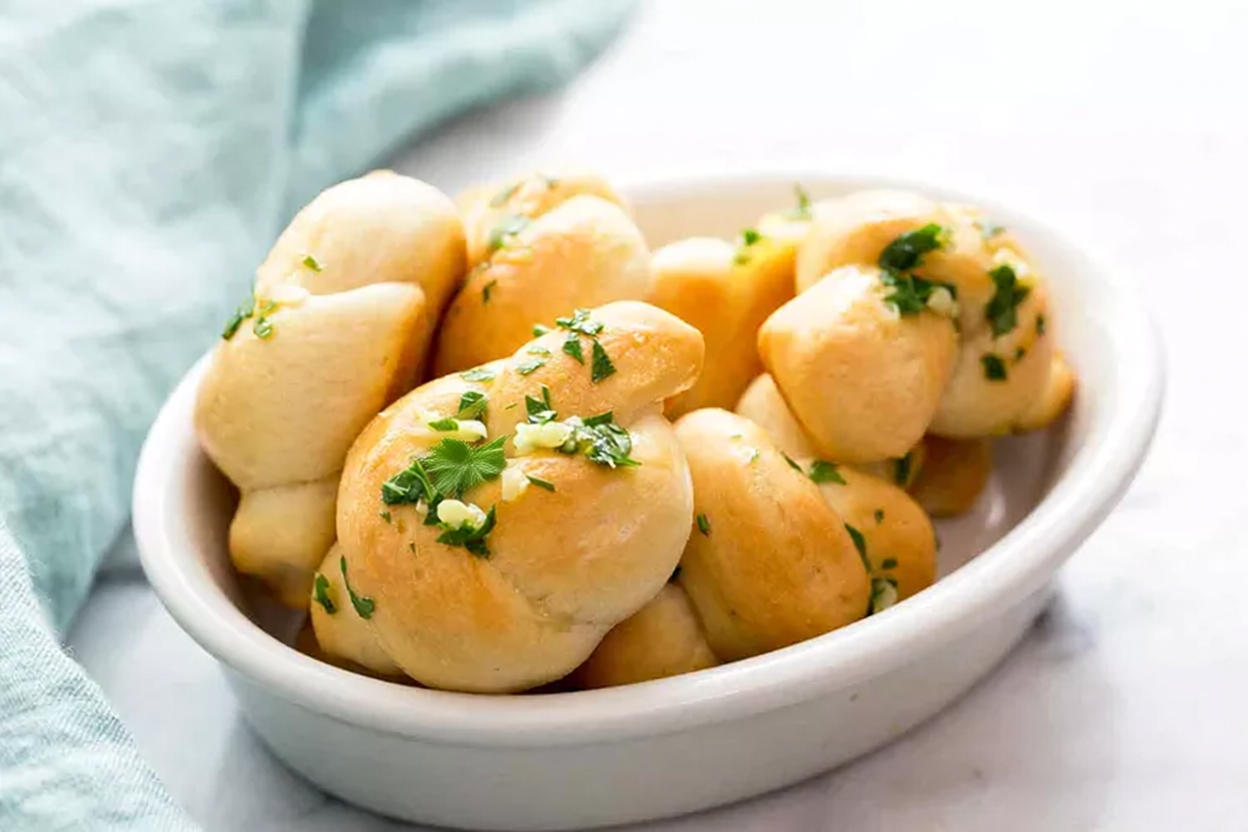
As soon as the knots come out of the oven, I generously brush them with the warm garlic butter mixture. I make sure to coat every curve and crevice.
For extra flavor, I sometimes sprinkle a little extra parsley or even grated Parmesan cheese on top.
Serving and Decoration
Suggested Pairings
I love serving these easy garlic knots with:
Marinara sauce for dipping
Pasta dishes like spaghetti or lasagna
Soups such as tomato basil
As a party appetizer
They taste best warm, fresh from the oven, when the garlic butter is still soaking into the bread.
Storage Instructions
Keeping Garlic Knots Fresh
I store leftover garlic knots in an airtight container at room temperature for up to 2 days. To refresh them, I warm them in the oven at 350°F for about 5 minutes.
Freezing Instructions
To freeze, I place cooled garlic knots in a freezer-safe bag and freeze for up to 2 months. When ready to enjoy, I reheat them in the oven until warmed through and brush with a little extra melted butter.
Conclusion
These easy garlic knots from scratch are soft, buttery, and packed with bold garlic flavor. I love how simple the dough is and how versatile the recipe can be. Whether I’m making them for family dinner or a gathering with friends, they always disappear fast.
If you’re looking for a foolproof homemade garlic knots recipe that delivers bakery-style results, this is the one I always come back to. Once you try them fresh out of the oven, you’ll never go back to store-bought again. 🍞✨