Discover the art of making your own apple cider vinegar using simple ingredients and traditional fermentation methods.
This versatile kitchen staple not only adds depth to your culinary creations but also serves as an effective natural cleaning solution.

With just apple scraps, sugar, and patience, you’ll create a sustainable, cost-effective vinegar that rivals store-bought versions.
Ingredients List
Creating homemade apple cider vinegar requires minimal ingredients, making it an economical choice for home fermentation.
Primary Ingredients
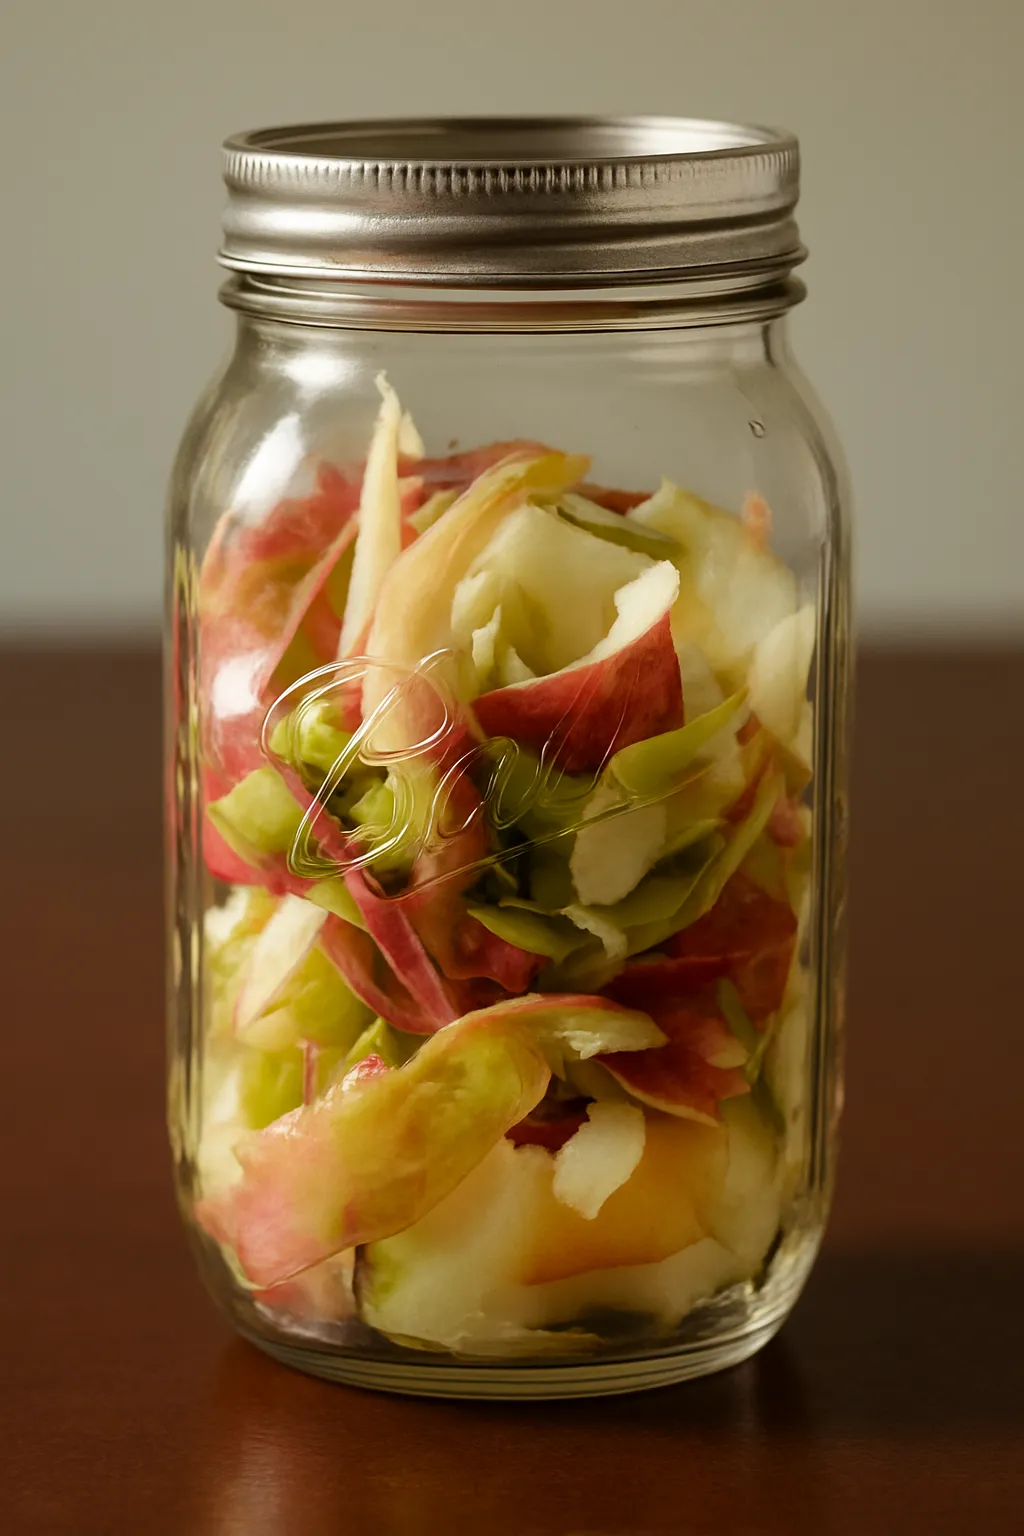
- Cores and peels from 6-8 organic apples
- 2 tablespoons sugar
- Filtered water (enough to cover apple scraps)
Required Kitchen Tools
To successfully prepare your homemade apple cider vinegar, gather these essential tools:
- Large Glass Jar: A 4-cup mason jar or similar container
- Paper Towel or Butter Muslin: For covering the jar
- Rubber Band or Jar Band: To secure the covering
- Strainer: For separating liquid from solids
- Storage Bottle: For the finished vinegar
- Wooden Spoon: For stirring
Initial Fermentation Process
The first stage of making apple cider vinegar involves creating the perfect environment for natural fermentation to begin. This crucial phase sets the foundation for developing the characteristic flavors and beneficial properties of your homemade vinegar.
Preparing the Apple Mixture
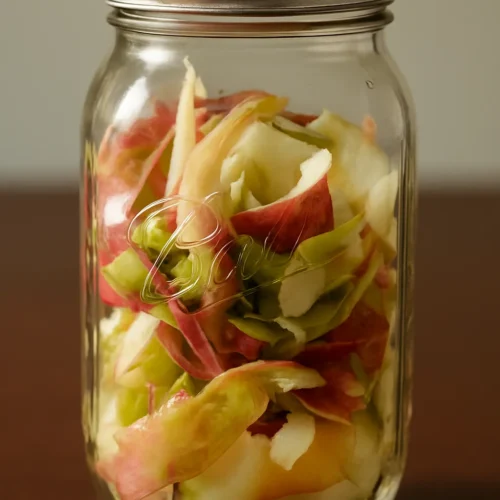
- Collecting Apple Scraps
- Save cores and peels from your apple-based recipes
- Ensure apples are thoroughly washed before use
- Preferably use organic apples to avoid pesticide residues
- Setting Up the Fermentation Jar
- Place apple scraps in your clean glass jar
- Pour filtered water until scraps are completely submerged
- Add sugar and stir until dissolved
- Leave about 2 inches of headspace at the top
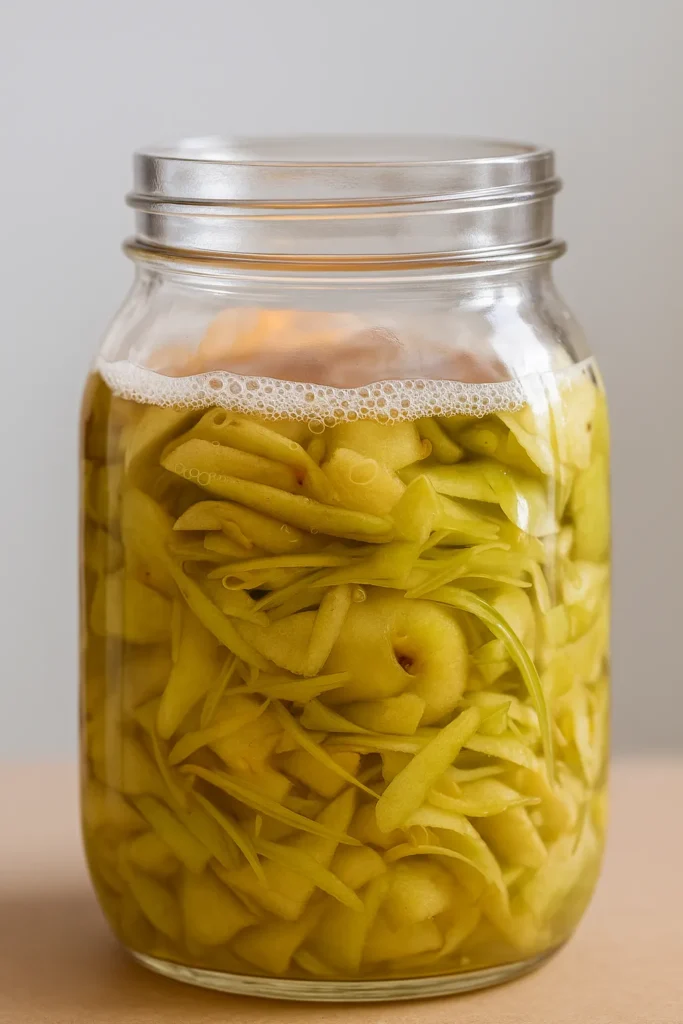
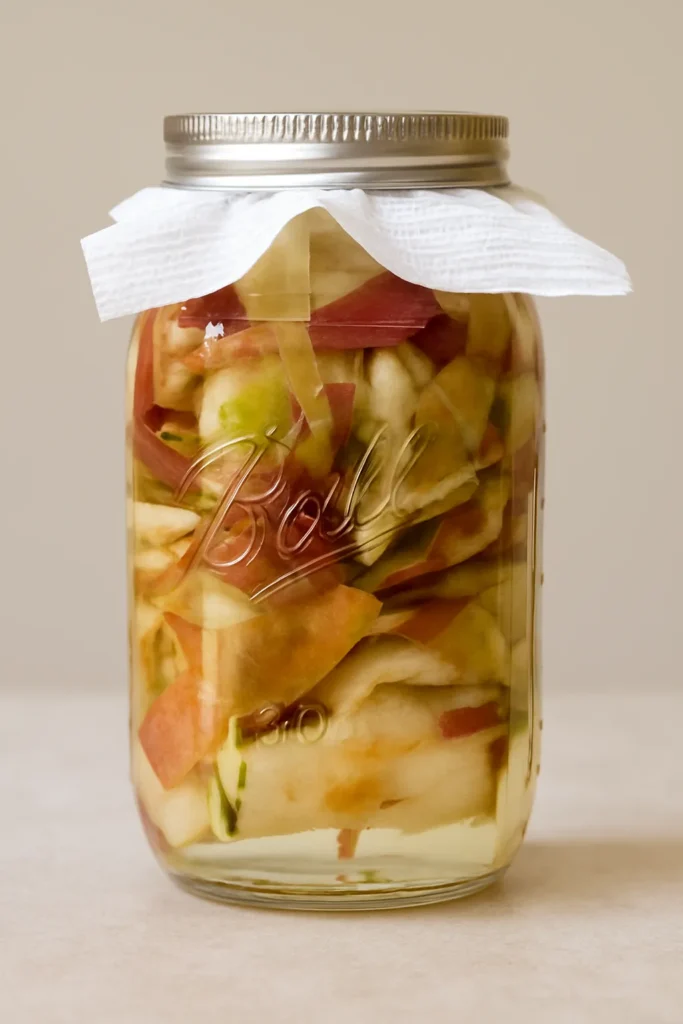
First Fermentation Stage
- Covering the Jar
- Place paper towel or butter muslin over the jar opening
- Secure covering with rubber band or jar band
- Ensure covering is tight enough to keep out insects but loose enough to allow air flow
- Initial Fermentation Period
- Store jar in a dark, room-temperature location
- Ideal temperature range: 65-75°F (18-24°C)
- Let mixture ferment for exactly 2 weeks
- Check periodically for any mold growth (remove if present)
Secondary Fermentation and Development
After the initial two-week fermentation period, your apple cider vinegar enters a crucial development phase where it transforms into true vinegar through acetic acid fermentation.
Straining and Second Fermentation
- Straining Process
- After 2 weeks, strain the liquid from the apple solids
- Use a fine-mesh strainer or cheesecloth
- Collect the liquid in a clean container
- Compost the strained apple scraps
- Second Fermentation Setup
- Return strained liquid to a clean jar
- Cover again with paper towel or butter muslin
- Secure with band or rubber band
- Place in same dark, room-temperature location
Monitoring and Maintenance
- Daily Care
- Stir the liquid once daily
- This helps incorporate oxygen
- Observe the development of the “mother” (beneficial bacteria)
- Watch for any changes in color or smell
- Development Signs
- Liquid will gradually become more cloudy
- A slight vinegar aroma will develop
- Color will deepen to amber
- “Mother” may form on surface (this is beneficial)
Final Stages and Storage
Testing for Readiness
- Checking Acidity
- After 4 weeks of second fermentation, taste test your vinegar
- Look for a strong, tangy flavor
- Vinegar should have a distinct acidic bite
- Color should be deep amber
- Adjusting Fermentation Time
- If not acidic enough, continue fermenting
- Check every few days until desired strength
- May take up to 6 weeks total for ideal flavor
- Trust your taste preferences
Storage and Usage
- Bottling the Vinegar
- Transfer to clean, airtight bottles
- Can strain out the “mother” or keep it in
- Store in a cool, dark place
- Will keep indefinitely when properly stored
- Uses and Applications
- Culinary uses:
- Salad dressings
- Marinades
- Cooking
- Household uses:
- Natural cleaner
- Garden fertilizer
- Hair rinse
- Culinary uses:
Troubleshooting Tips
- If mold appears, discard batch and start over
- If vinegar is too weak, continue fermenting
- If too strong, dilute with filtered water
- Keep away from direct sunlight
- Maintain consistent room temperature
homemade apple cider vinegar
Ingredients
Primary Ingredients
- Cores and peels 6-8 organic apples
- 2 tablespoons sugar
- Filtered water (enough to cover apple scraps)
Instructions
Days 1-14 (First Fermentation)
- Place apple scraps (6-8 apples' worth) in clean 4-cup mason jar
- Fill with filtered water to cover + 2 tablespoons sugar, stir
- Cover with paper towel/muslin, secure with band
- Store in dark place at room temp
- Let sit untouched for 14 days
Day 14 (Straining)
- Strain liquid from scraps
- Discard scraps to compost
- Return liquid to clean jar
- Cover with fresh paper towel/muslin
Days 15-42 (Second Fermentation)
- Return to dark storage
- Stir once daily
- Let ferment 4 more weeks
- Watch for "mother" formation
Day 42+ (Finishing)
- Taste test for acidity
- If needed, ferment longer, checking every few days
- When ready, bottle and store in dark place
Conclusion
Creating your own apple cider vinegar is more than just a money-saving endeavor – it’s a journey into sustainable living and traditional food preservation. This simple process transforms kitchen scraps into a versatile product that serves multiple purposes in your home.
By following this guide, you’re not only reducing food waste but also crafting a natural, additive-free vinegar that carries the unique signature of your kitchen.
The beauty of homemade apple cider vinegar lies in its simplicity: just apples, sugar, water, and time. While the process requires patience, the reward is a living, probiotic-rich vinegar that connects you to centuries-old fermentation traditions.
Remember, each batch will be unique, reflecting the apples used and the environment in which it was created. Don’t be afraid to experiment with different apple varieties or adjust fermentation times to achieve your perfect balance of flavors.
With this knowledge in hand, you’re ready to begin your journey into the rewarding world of vinegar making.